S2000 RacingBrake Front Two-Piece Brake Rotor
and MPG Rear +1 Two-Piece Big Brake Kit Review
By Rob Robinette
[UPDATE April 2013: I've been running these big brake kits for a couple of years now and I'm still very, very happy with their performance and longevity. A serious track S2000 will greatly benefit from a big brake kit, especially in the front.]
After Cale's brake failure and accident I decided to
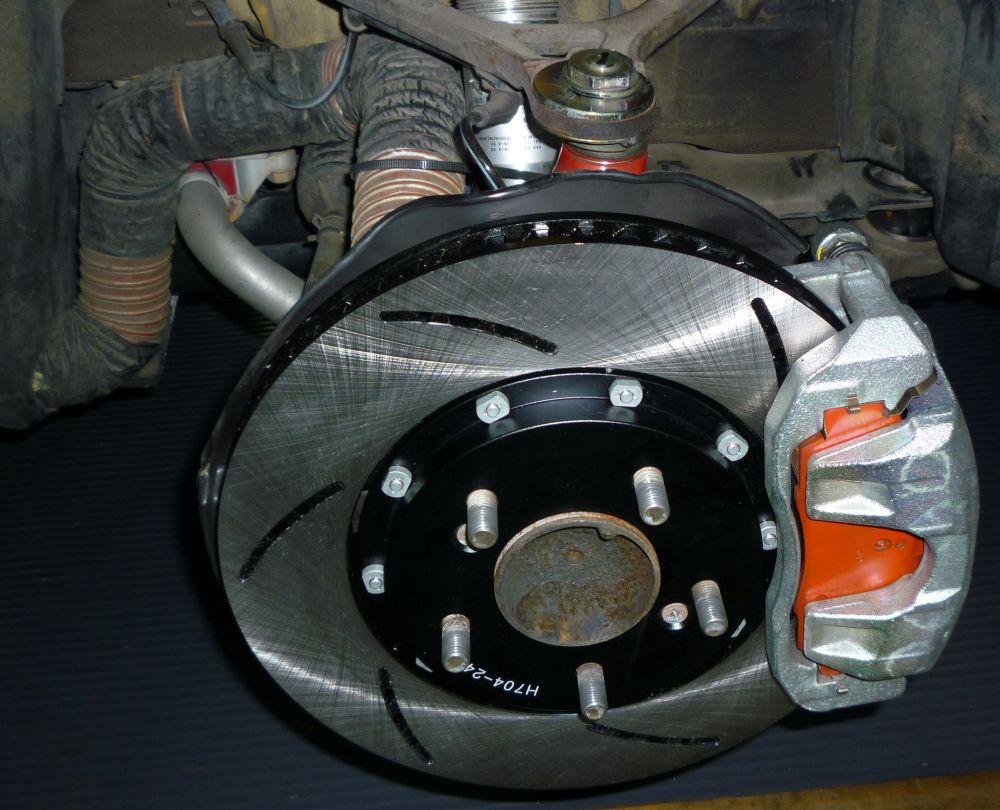
give the heavy duty RacingBrake two-piece rotors a try. They have an aluminum hat
and the rotors are connected so they are allowed to "float." The rotors have
smaller cooling vents so the rotors are thicker than stock rotors--they're quite
beefy--even so they are 3 pounds lighter than stock
rotors.
They are expensive but I was told I'd get a full season's use out of a set so I
took the plunge. I was cracking front rotors every 3 or 4 track days so the total
cost is very comparable. I paid about $550 for the ready to install rotors from
www.racingbrake.com
I installed them in Nov 08 and ran 23 events with about 27 hours of track time
when I finally cracked the left front rotor (crack propagated to the outside
edge--see photo below) in Nov 09. Spider cracks did develop after only a few
events and I freaked, but I kept running them until a crack made it all the way
to the outside or inside edge of the rotor.
I have 2 inch brake cooling ducts from the front bumper to the brake dust shields. I ran one
set of Cobalt XR2, one set of Carbotech XP12, and many sets of XP10 brake pads.
All the events were run on r-compound tires.
On a separate note my new preferred brake pad setup is Carbotech XP10's in the
front and Cobalt XR3's in the rear. The XR3's seem to bite a little less hard so
it helps with the rear brake bias and the rear pads are lasting at least twice
as long as the XP10's and XP8's I used to run back there.
I replaced the cracked rotor using the RB replacement rotors (no hats) with new
nuts and bolts. I paid $430 for the 2 replacement rotors.
Swapping the replacement rotors onto the RB hats was very easy. They are held in
place with high quality crimp self-locking hardware. New hardware is included
with the replacement rotors.
The vanes are directional so be sure to install the new rotors with the slots
running the same direction as the ones you're replacing. Also, check that all
the "nuts" are completely seated and torque them to 8 foot-pounds or 96
inch-pounds. The documentation states, "proper torque is required to ensure
proper floating function." As with any brake rotor install, clean the new
rotor surfaces with brake cleaner before use.
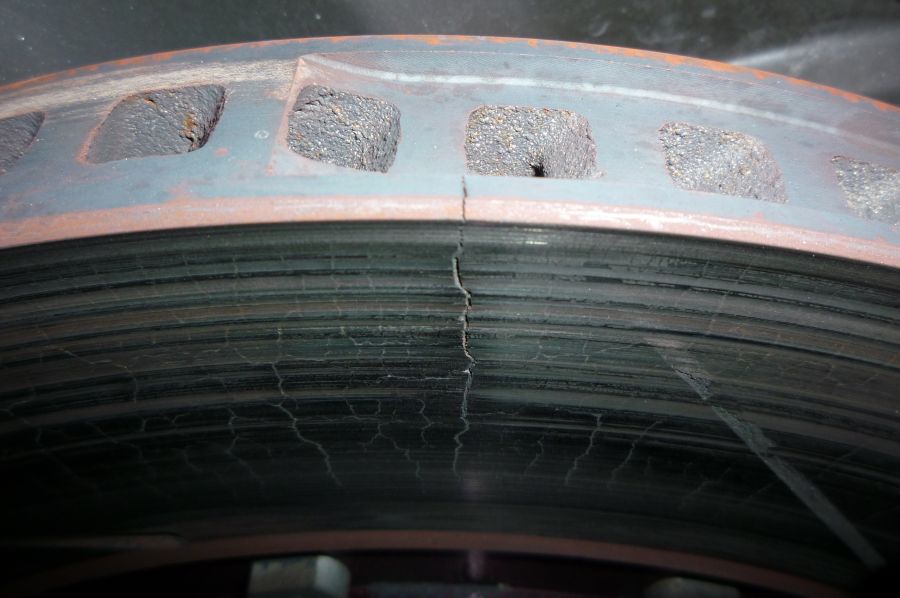
Here's the terminal crack that formed after 27 hours of track time
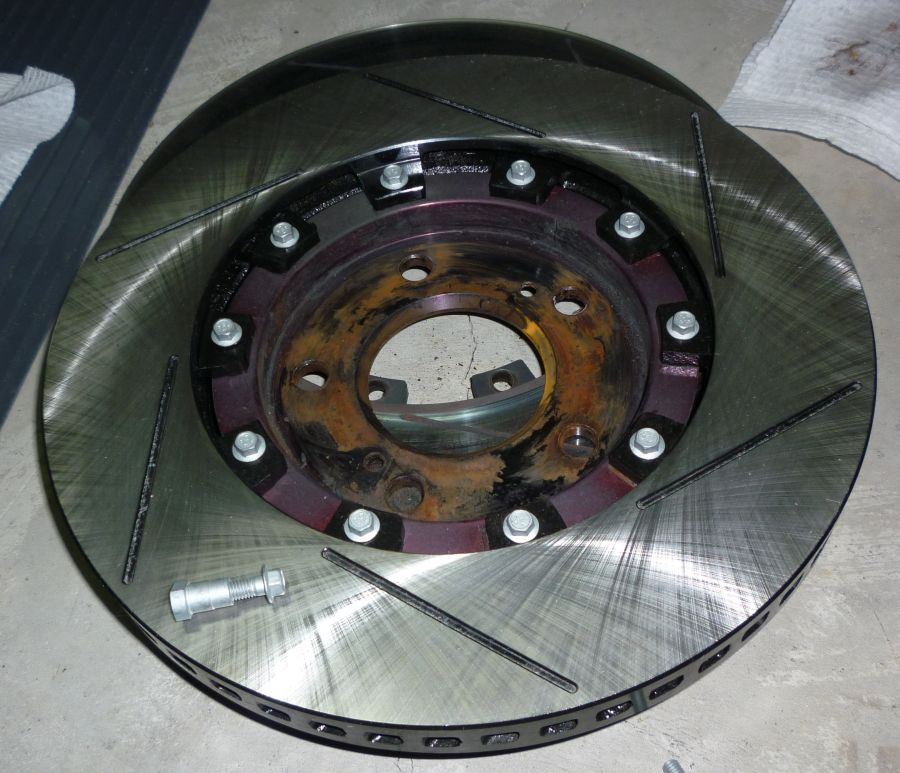
The new rotor on the old hat.
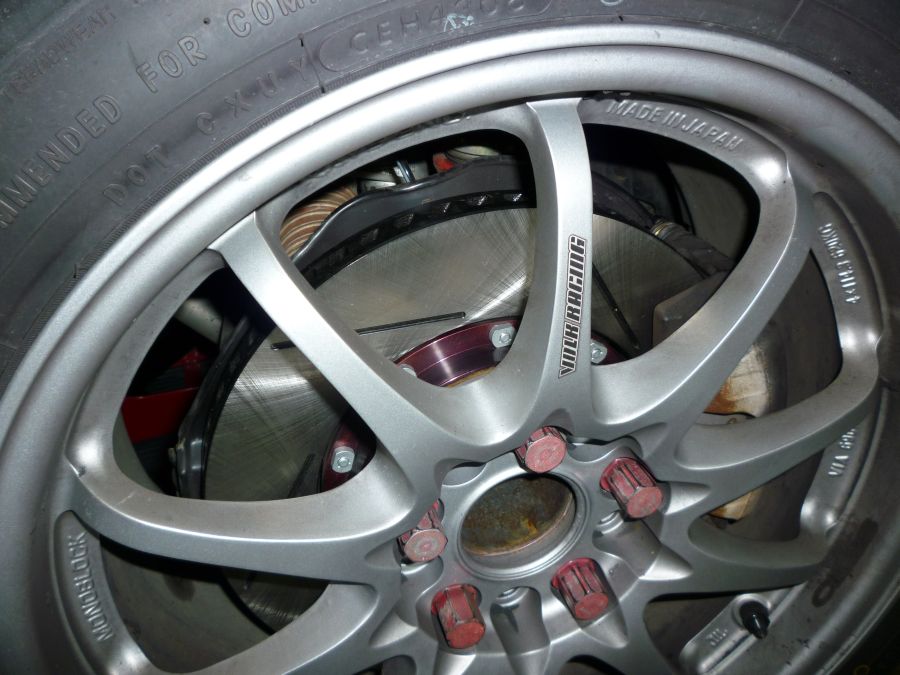
The new rotor installed.
Update: In 2010 I upgraded to RacingBrake's Accord caliper/NSX rotor front big brake kit. This rotor & hat is even beefier than the RB S2000 rotor and allows the larger, more robust (but heavier) Accord caliper to be used. Using this setup my brake pads are lasting almost twice as long due to the Accord calipers ability to handle higher heat. I am very happy with this front brake setup. To use this setup order a set of 2006 Accord V6 manual transmission calipers, about $80 each with no core return required (this is cheaper than stock S2000 calipers). Then add a set of the RacingBrake Accord/NSX rotors & hats: http://www.racingbrake.com/S2000_FRONT_00_09_p/2139-381.htm This big brake kit will even clear the stock AP1 16 inch wheels.
RacingBrake S2000 Track Duty Accord Caliper & NSX Rotors

Rear Two-Piece 12.1 inch Big Brake Kit From Motorsports Performance Group
I purchased the MPG prototype 12.1 inch two-piece big brake kit to reduce unsprung weight (3lbs lighter than stock) and reduce the wheel bearing heat-soak--I've already replaced three rear wheel bearings. The kit can be seen here: http://www.shop.motorsportsperformancegroup.us/Big-Brake-Kit-OE-Caliper-S2000-REAR-00-09-2145-381-0.htm On track performance has been fantastic with the RacingBrake & MPG brakes all around. I used an infrared thermometer to check the brake temperatures immediately after a hard track session on a 90 degree day. These MPG rear brakes are running about 200 degrees cooler than the front brakes and the wheel hub is consistently running less than 200 degrees--a lot cooler than my old stock rear brakes.
Because this kit uses the stock rear calipers and a thicker brake rotor, new full-size brake pads will not fit. RacingBrake & MPG sell slightly thinner brake pads that will drop in. You can also special order Carbotech and other brand pads to whatever thickness you want. Carbotech does not charge extra for this. I've been using normal thickness pads by replacing one brake pad at a time. After running with one new pad and one thin old pad for a while you'll have enough room to drop the other pad into the caliper. This sounds like a lot of work but keep in mind the brake pads last for freakin' ever with this kit. I'm running Cobalt XR3s with the kit and they just don't wear.