S2000 Brake Duct Install
By Rob Robinette
After melting two sets of Porterfield R4 brake pads and setting a caliper on fire I decided I needed to do something to cool my brakes on the track.
Vented disk brakes are designed to cool themselves from the inside. The
vanes inside the hollow disk act like a fan, moving air from the center of the
disk, through the disk then out the outside edge (see disk below).
With the dust shield in place the stock disk gets much hotter on the inside face
of the disk versus the outside which gets cooling air through the wheels. That's
not a problem as long as the temperature change is relatively gradual--no
thermal shock. The ducted air from this mod simply feeds the inside face and
center of the disk cool air, and that's a good thing.
I've run a couple of years with this ducting and it made a huge difference in brake performance and pad life--this setup works!
I used 2 inch hose because it's much easier to run under the air pump and gives more tire clearance in the wheel well than 2 1/2 or 3 inch hose. It doesn't make sense to run a 3 inch hose and then constrict it under the air pump, then connect it to a 2 inch hole in the dust shield. This 2 inch setup works well but when I removed my air pump in March 2011 I moved up to 2 1/2 inch hose and flanges. If you remove the air pump then even a 3 inch hose might be the way to go but you will get some pretty good tire rubbing if you run 255 or wider tires up front.
The Finished Product
Melted Porterfield R4 Brake Pads - Why I Added the Ducts
What's Needed
Special Tools
: 2 (or 2 1/2) inch hole saw designed to cut metal. You'll use it to cut the brake dust shields, fender liner, and bumper. Sourced from Home Depot.Parts: 12 feet of 2 (or 2 1/2) inch high temperature silicone hose, part # 3621-2.00-12 $70 http://www.pegasusautoracing.com/productselection.asp?Product=3621
4 two (or 2 1/2) inch aluminum flanges (2 for bumper, 2 for dust shield), part # 10350-8 $7.30 each http://www.aircraftspruce.com/catalog/appages/ductflanges.php
8 nuts & bolts for bumper flange. I used black bolts and black plastic washers to blend into the bumper's black ducts. Sourced from Ace Hardware.
4 nuts and bolts for dust shield flange (or pop rivets)
4 two (or 2 1/2) inch hose clamps
At least 4 fourteen inch tie-wraps
Duct tape
Parts Removal
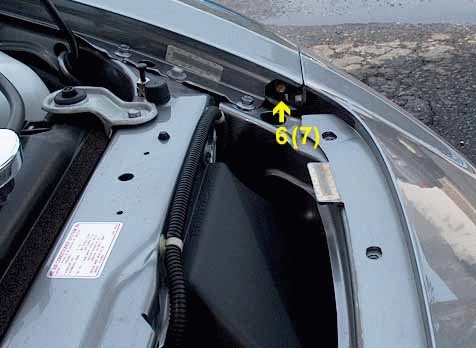
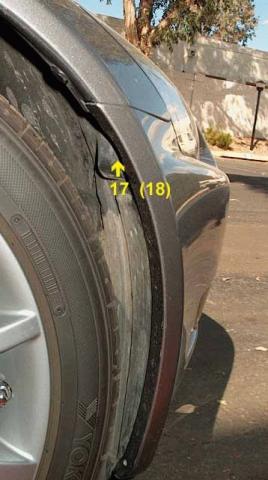
Put the front of the car up on jacks and remove the front wheels. I followed this How-To by Arnell to remove the front bumper. Just remove all the fasteners below, then pop the bumper loose from the clips under the headlight. Make sure the outside edge of the bumper is outside the fender liner and pull the bumper straight out and it will pop loose.
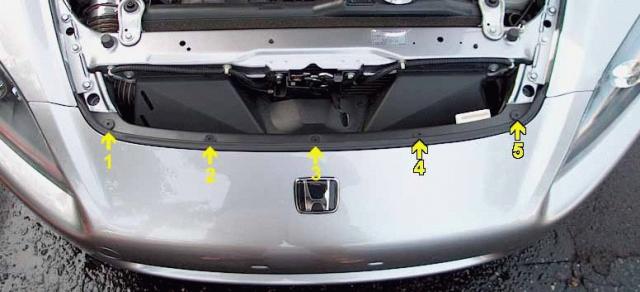
Photo by Arnell
Photos by Arnel
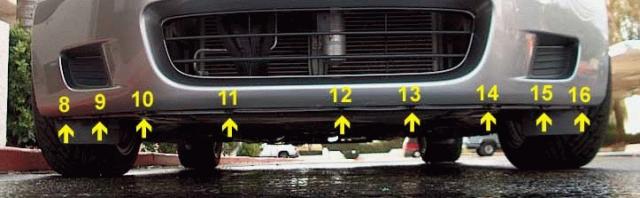
Photo by Arnel
Bumper Off
Follow this How-To to remove the brake calipers and disks.
Running the Ducts
On the driver side of the car you have to run the hose around the air pump. It is preferable to put the hole in the fender liner about mid level like I did on the passenger side, but unless you remove the air pump you have to run the hose on the driver side as low as possible to prevent the hose from being constricted by the air pump. Be sure and sand down the hole edges to keep them from eating into your hose. I put a layer of duct tape around the hose where it goes through the hole, touches the stabilizer bar, and where it's secured to the shock body.
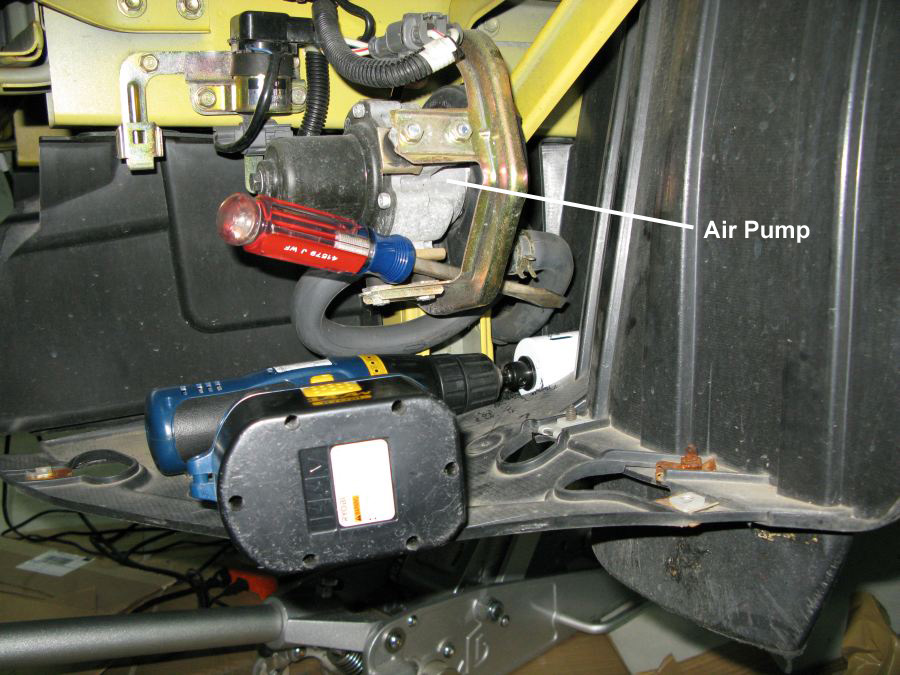
Ready to Drill Hole in Left Fender Liner - Screwdriver is Used to Lift Air Pump Hose
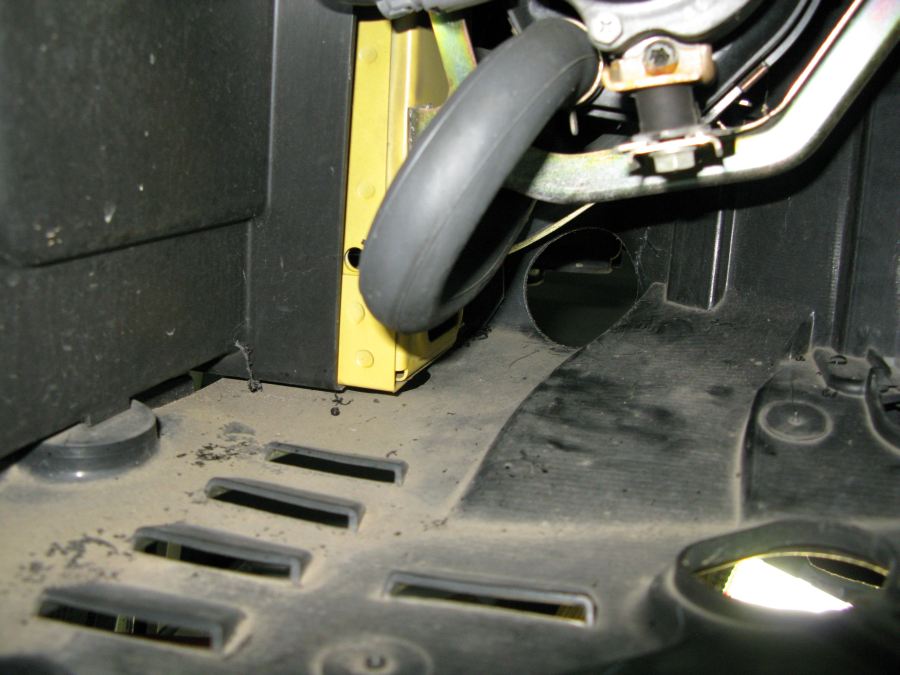
Driver Side Fender Liner Hole
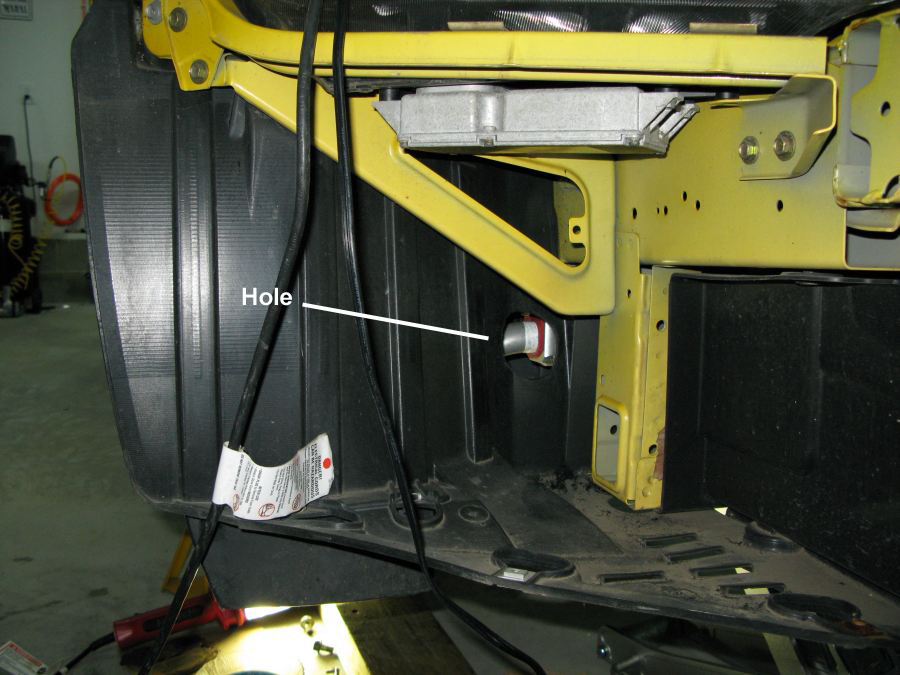
Passenger Side Hole
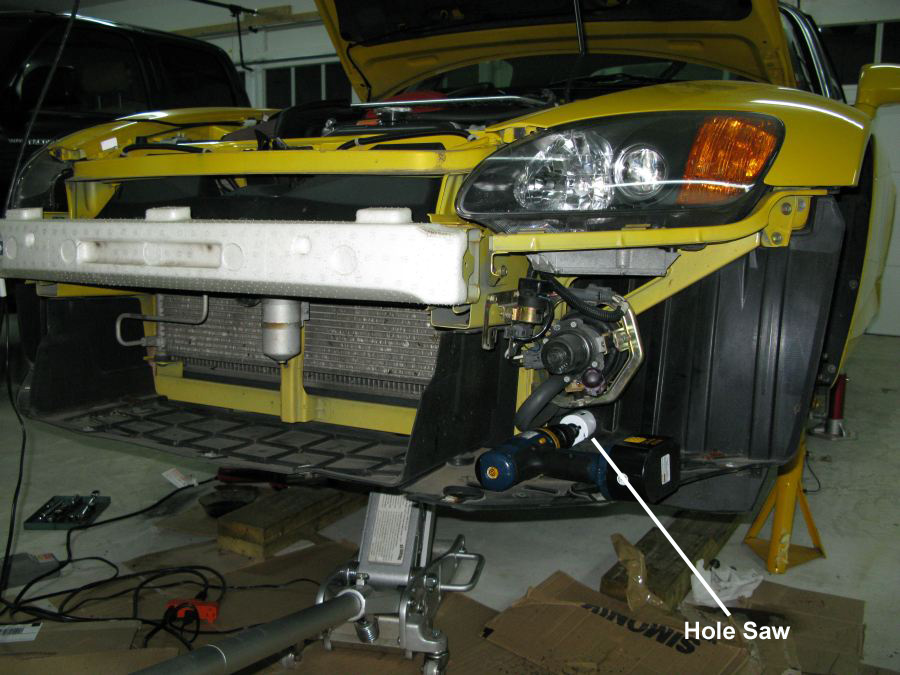
Use the 2 inch hole saw to cut your hole in the bumper. I used the flange as a guide for where to place the hole and where to drill the bolt holes. Secure the flange to the bumper. I used four black hex-head bolts so they wouldn't be so obvious. I also painted the inside of the flanges black for the same reason. I had to remove a little metal on the flange to fit around the fog light mounting tabs. You can also just cut off the tab if it gets in the way.

Bumper Hole
I used a box cutter to cut the hose and then used wire cutting dykes to cut the hose wire. Cut the 12 foot hose in two and run the 6 foot sections through the fender liner holes. This is when I put the duct tape in place to reinforce the hose where it goes through the fender liner hole.
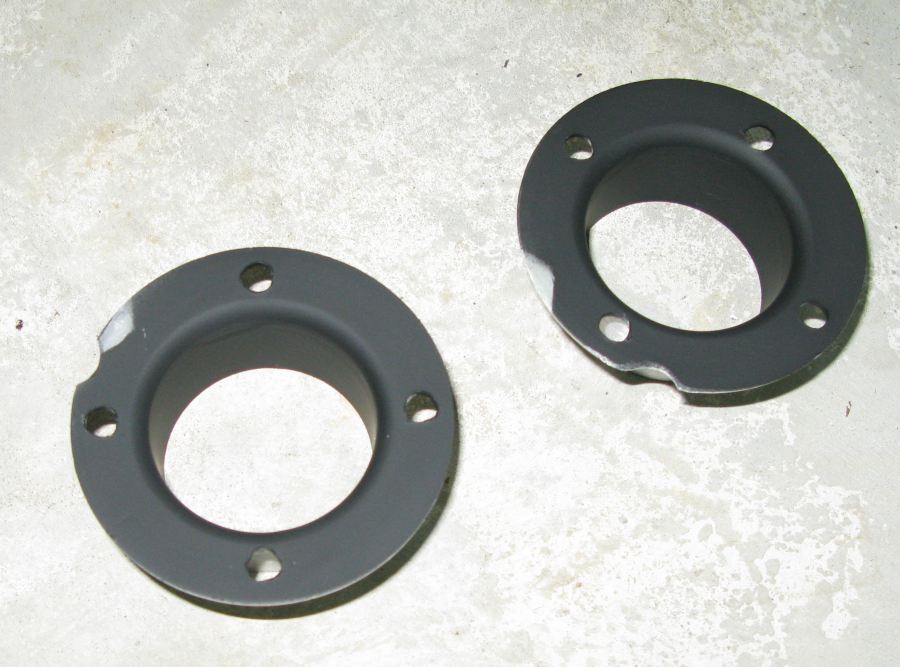
Painted Bumper Flanges
Clamp the hoses to the bumper flanges. It helps to put the bumper on top of something to get it close to its mounting location. As you mount the bumper, pull the excess hose through the liner hole from the fender well side.
Bumper Hose Connection
Pop the fender in place. Make sure the outside edges of the fender are outside the fender liner, and that the radiator floor pan is inside the lower lip of the bumper. Once the clips under the headlight pop into place the bumper is secure. I recommend waiting to put all the fasteners in place until you're finished with the install just in case you need to remove the bumper again.
Bumper Installed
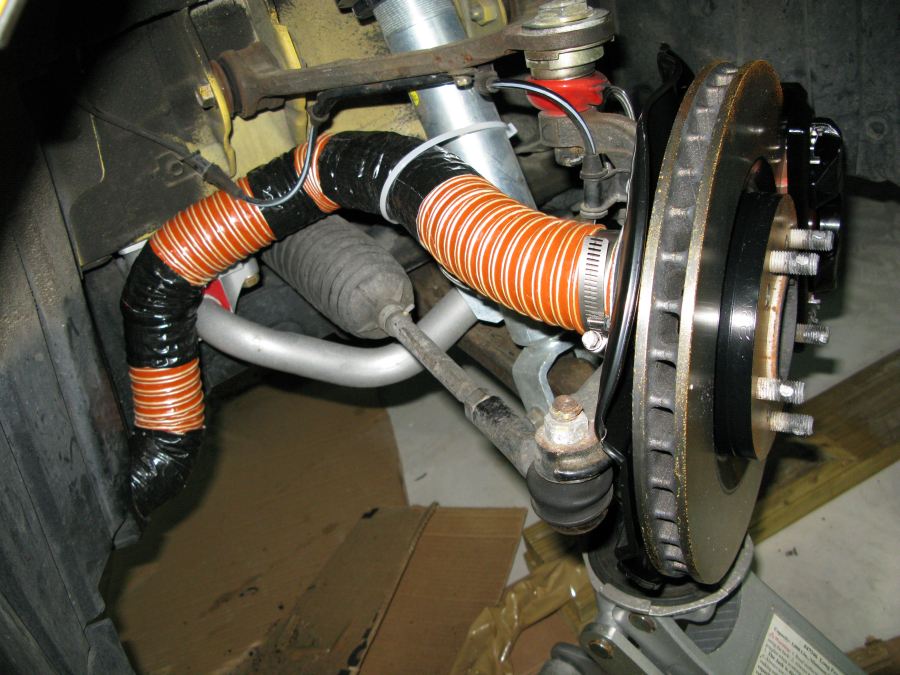
The hose needs to run along the inside of the wheel well, then under the upper A arm to the dust shield. I used 14 inch tie wraps to secure the hose. One tie wrap around the stabilizer bar mount and one around the shock body.
You can modify the brake dust shields with them mounted on the car, but I had already cut mine off so I had to source some new shields. I cut them as shown to allow installation without removing the wheel knuckle.
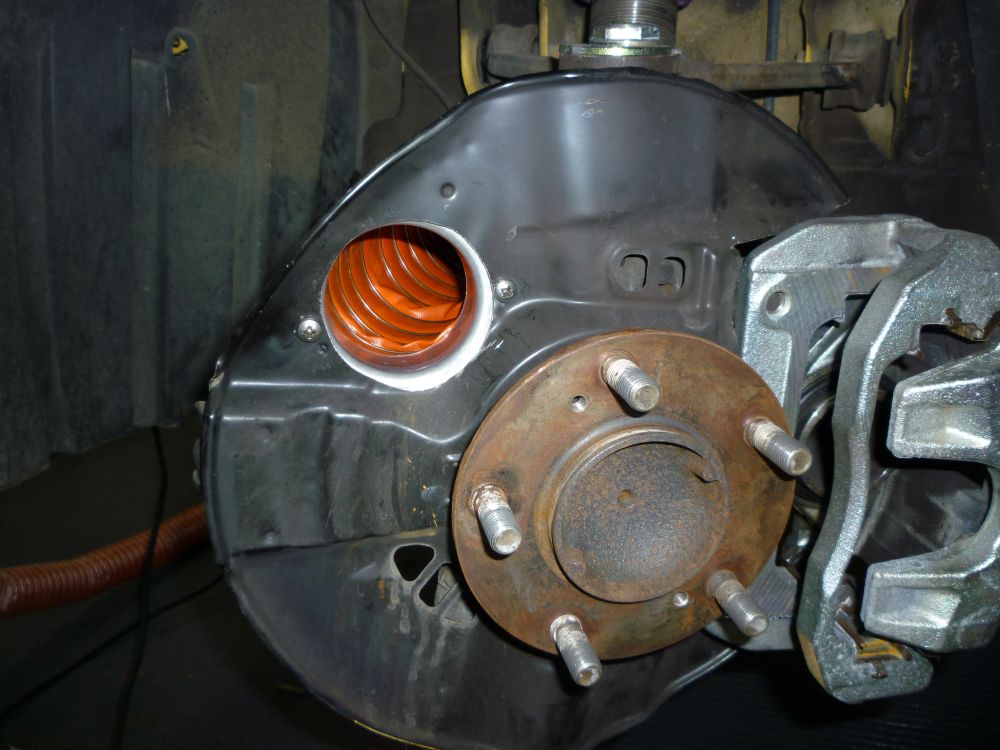
Use the 2 inch metal hole saw to cut the dust shields. I made a 1/8th inch pilot hole first to keep the hole saw bit from walking. I cut the hole in the dust shield as close to the center of the brake disk as possible to send as much cooling air to the inside of the vented brake disks. Before you drill check for clearance around the driver side ABS sensor. It was a tight fit for me. For more clearance you should drill the hole a little more clockwise around the dust shield than I did.
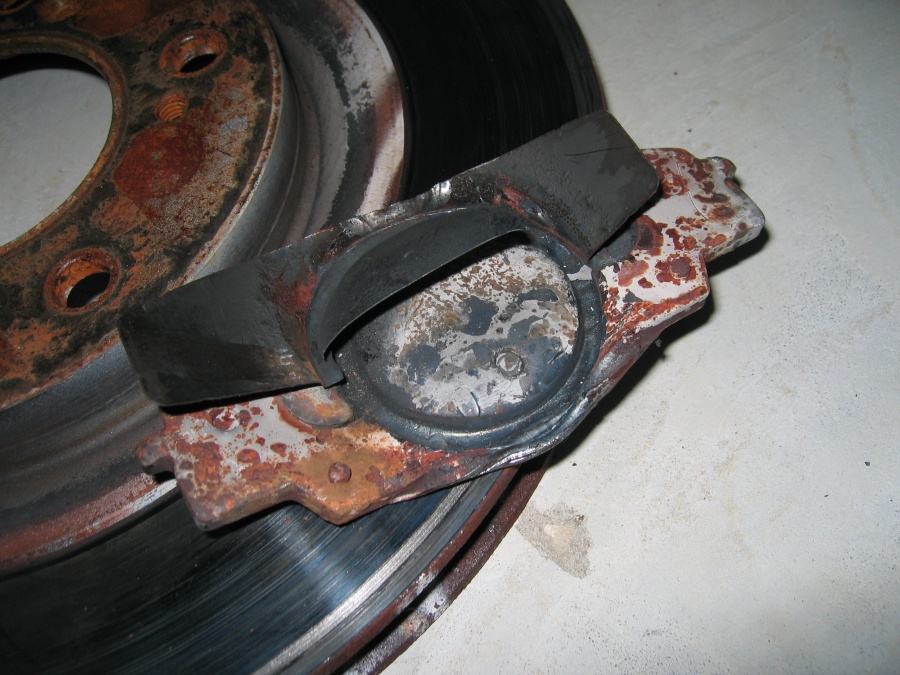
I bent the outside edge of the dust shields to close the gap between the shield and disk to prevent air leakage.
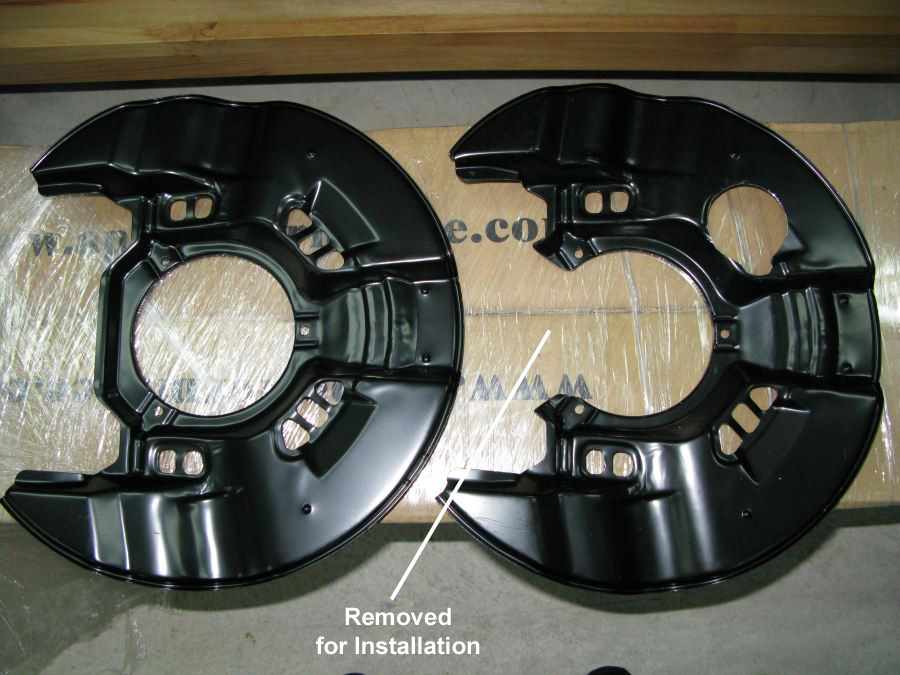
Brake Dust Shield Before and After
I trimmed and bent the inside edge of the flange to help the flange-to-dust shield seal (see below). The aluminum flange is easy to cut with tin snips and I used a pair of pliers to bend the flange to fit. I used two 8mm bolts to secure the flange to the dust shield.
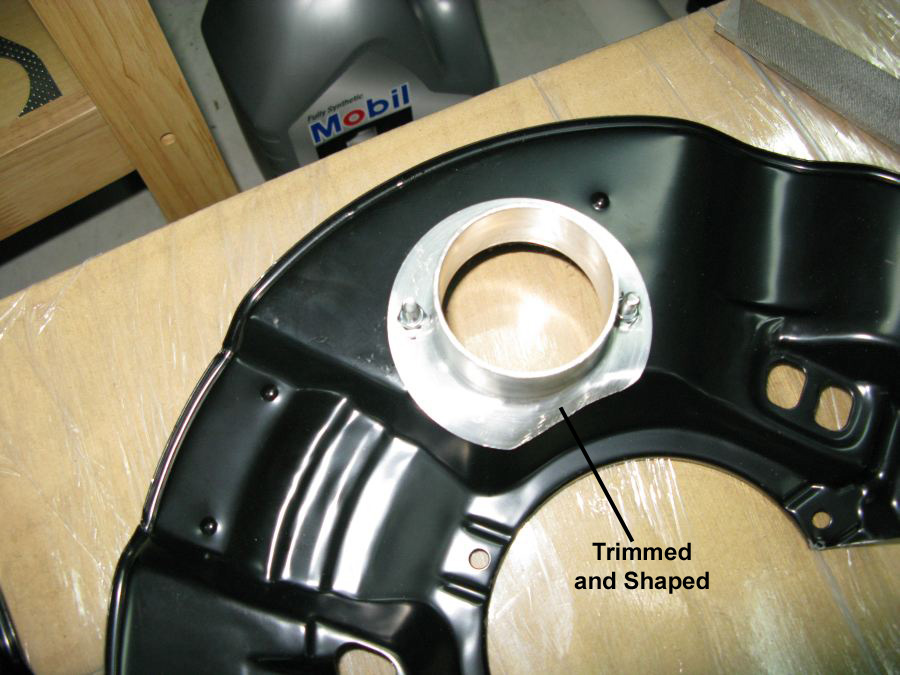
Dust Shield Flange - Notice Lower Edge Trimmed and Shaped
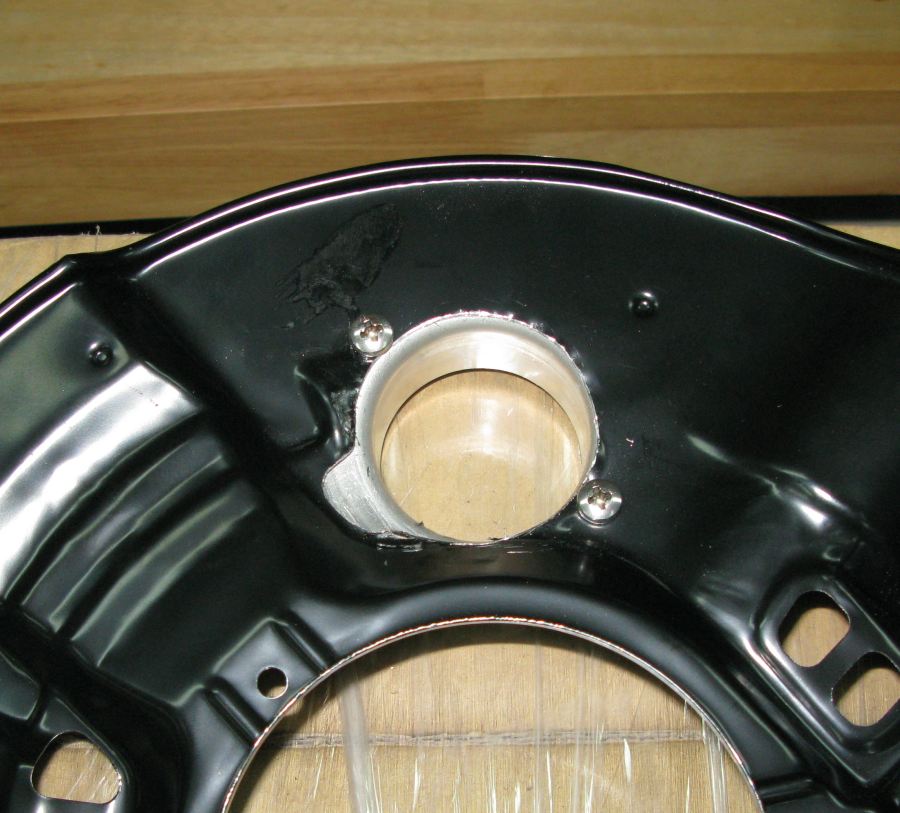
Dust Shield - Brake Disk Side
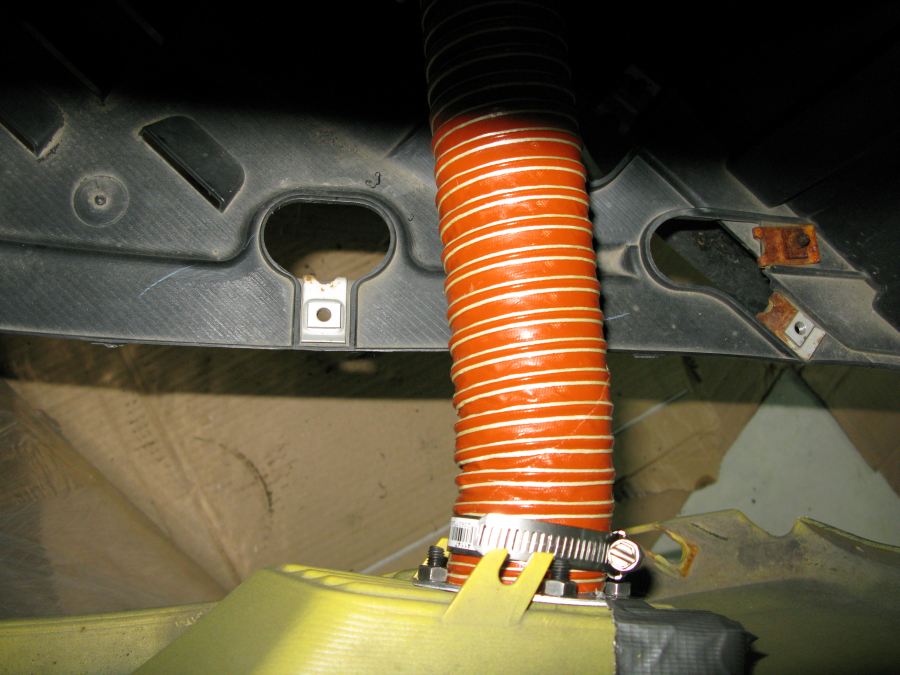
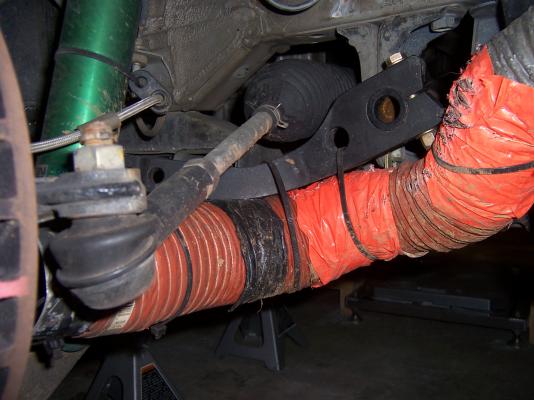
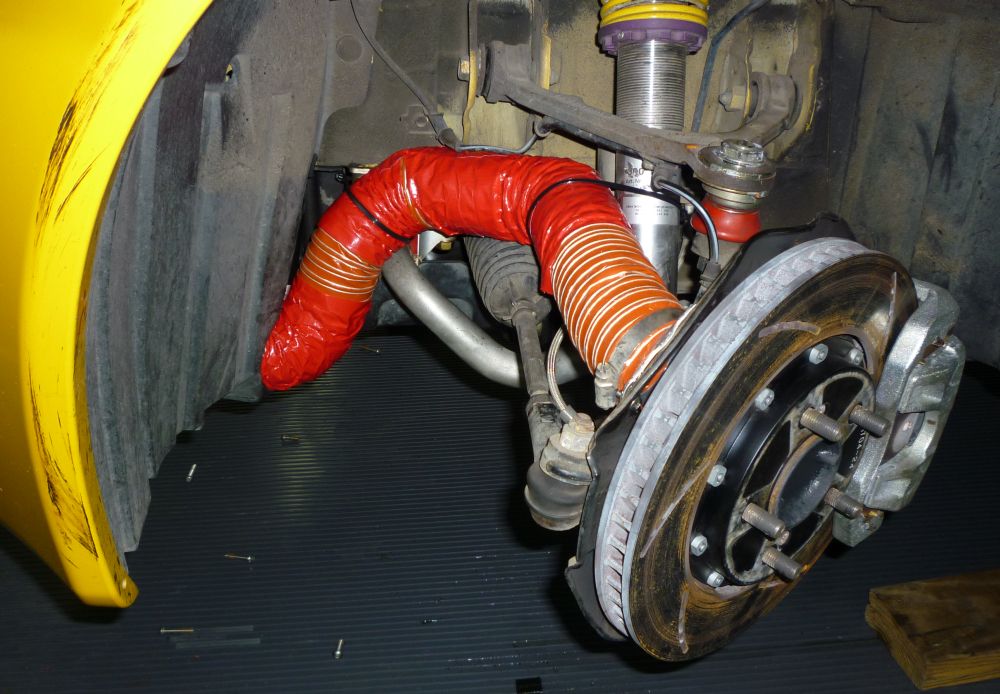
Before you make the final hose cut, make sure the steering wheel is turned to full lock to the left for the left side install and to the right for the right side install for full hose extension. Clamp the hose to the flange, finish tightening the tie wraps (not too tight though) and move the steering from lock to lock to verify clearance.
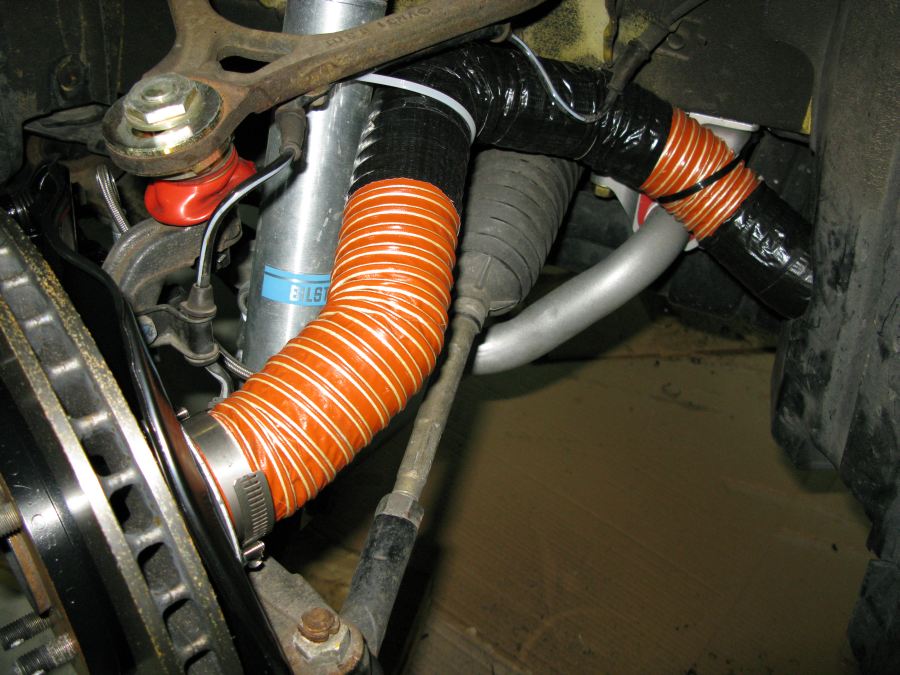
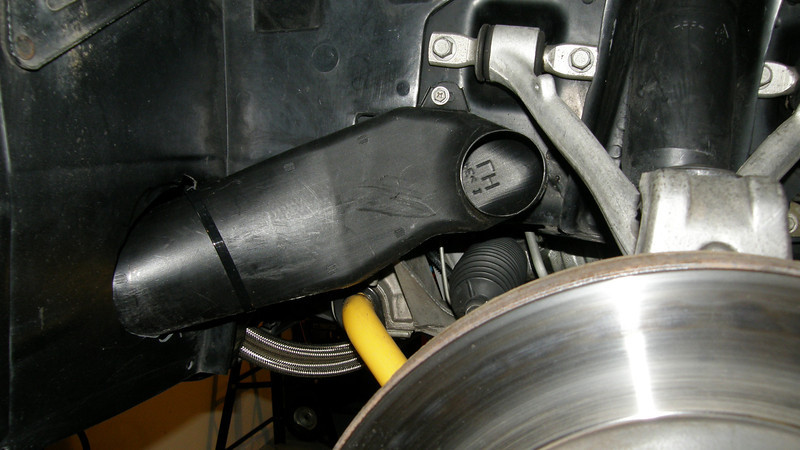
Right (passenger) Side - Steering Full Right for Full Hose Extension
Left Side Steering Full Left - Notice Bend in Dust Shield Edge for Better Air Seal
Here's an alternate routing option using 3 inch hose and a tin can (left side of picture) as the hose end aimed at the bare brake disk (dust shields removed)
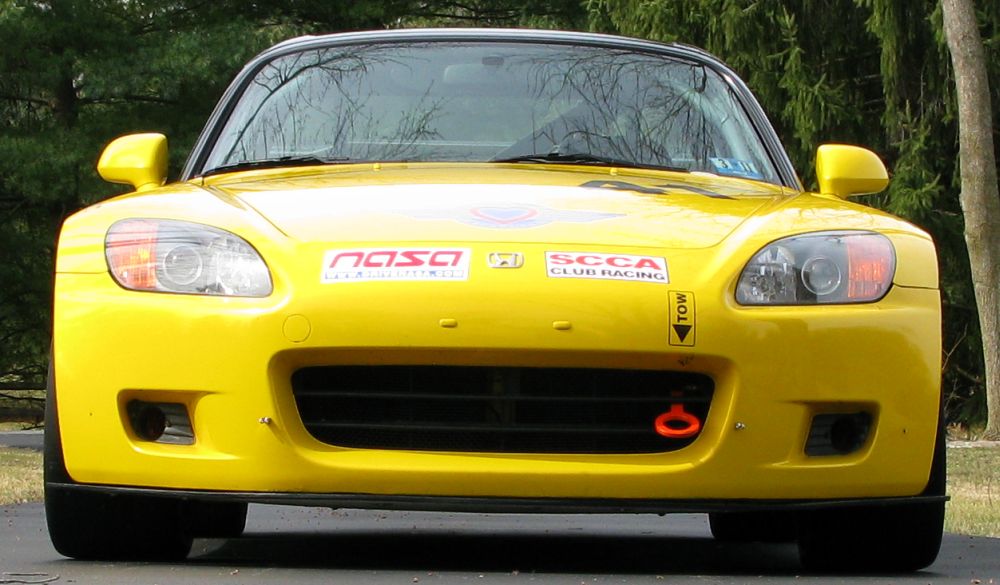
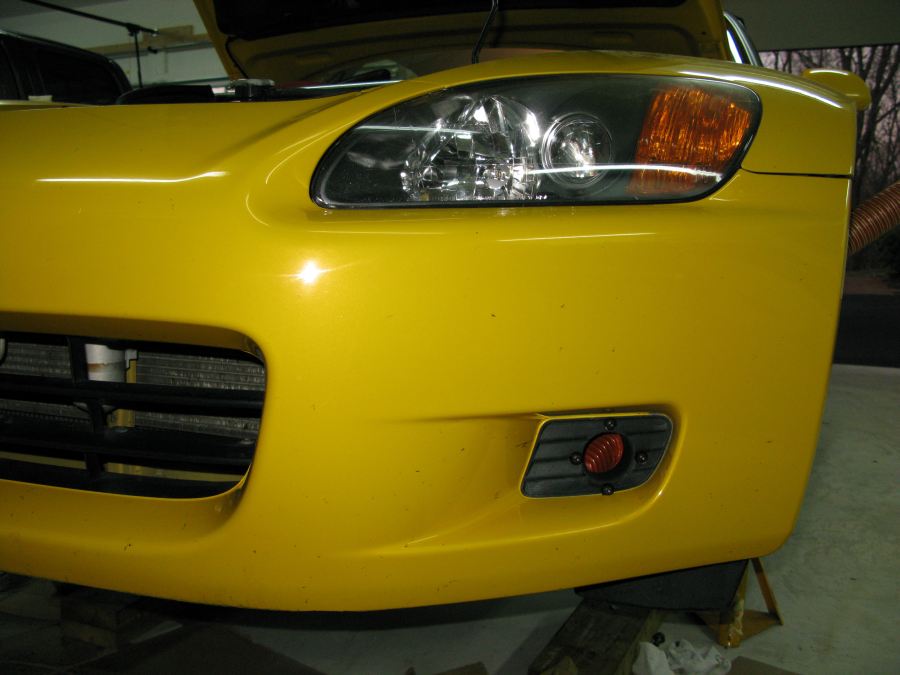
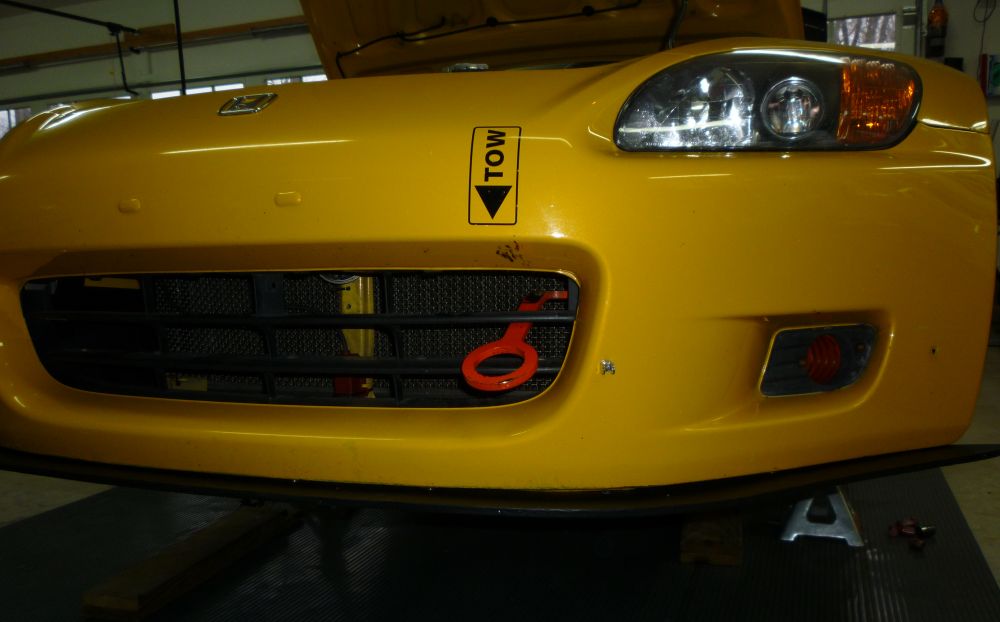
Blacked Out Ducts are Barely Noticeable
Don't forget to put all the bumper fasteners back in and follow the brake How-To to reinstall the brake disks and calipers. This would also be a great time to bleed the brakes.
Install the wheels and torque the lug nuts to 80 lb-ft.
I recommend at least partially covering your cooling vents during brake pad bedding. If you don't it may be hard to get the pads as hot as they need to be.
Drive the car for a few miles and make some full lock turns and then check the hoses for tire rubbing.
Enjoy those functional brake vents.
March 2011 Update - Up-Sized to 2 1/2 Inch Ducts
I had the nose off the car to do some race prep work and decided to replace my two inch ducting with 2 1/2 inch. I believe this is the perfect size as 3 inch hoses will be rubbed pretty badly by 255 width front tires. Here's a couple of pics of the upgraded brake ducts.
Upgraded 2 1/2 Inch Ducting
2 1/2 Inch outlet
2 1/2 Inch Bumper Inlet