How to Install a Racing Seat
By Rob Robinette
Installing a racing seat may give you more head room for wearing a
helmet, hold you more securely, and look really cool. The down side is that it's much more
difficult to get in and out of the car.
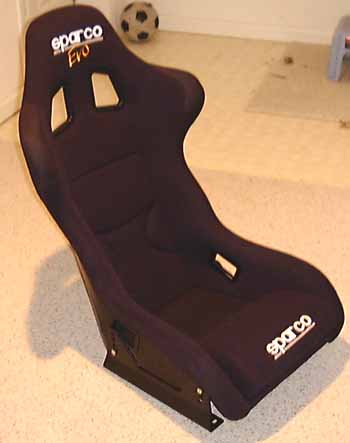
Sparco Evo seat with side brackets
installed
Taking the stock seat out is pretty easy as long as none of the five
seat bolts don't seize-up on you (one of mine did). Don't forget to disconnect the seat
belt warning electrical harness attached to the bottom of the seat. If you leave this
disconnected the car thinks your seat belts are fastened (good). The seat is easier to get
out the door if you fold it forward first.
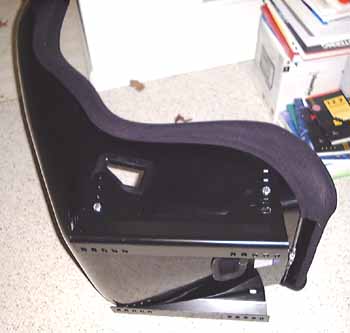
Better look at side brackets
The easiest way to mount the new seat is to unbolt the stock seat
from the stock seat rail, mount the rails back in the car, and mount the new seat to that.
If you choose not to use the stock seat rails and use a custom floor mount you will also
have to devise a way to use the right side seat belt anchor because it is attached to the
stock seat rails (see picture below).
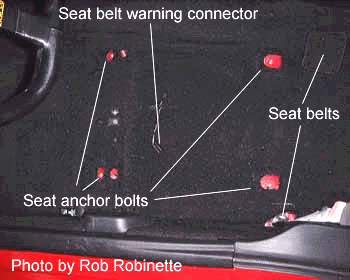
Floor with seat removed
My Sparco Evo seat with it's side mounts installed was too wide to
mount to the stock seat rails so I had to fabricate four, three inch square pieces of high
strength aluminum to use as an adapter. I bolted the four adapters to the stock seat rails
and then bolted the new seat to the adapters.
Note: The large Sparco Evo II seat is too wide for the 3rd gen and
will not fit (it's not even close).
You will be able to slide the seat fore and aft just like the stock
seat and the seat belt works just like stock too. You can adjust the seat's recline by
using a different mounting hole in the seat side mounts.
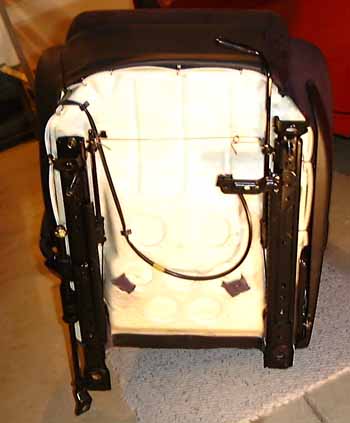
Stock seat rails (note seat belt
anchor at lower left)
Rob Robinette
|