S2000 Wheel Bearing, Hub & Lug Replacement
By Rob Robinette
Note: To replace the wheel lugs you must remove the hub. To remove the hub you will destroy your old bearings.
When I let the dealer replace my right rear bearing and hub I was shocked when the bill went over $500. I decided to buy a shop press and big torque wrench so I could do it myself next time. Well next time happened about 4 months after the first bearing went. Here's how I replaced my left rear wheel bearing and hub. I also recommend doing both rear and/or both front bearings when you do one because the other side of the car will fail shortly after the first one goes. The rear bearings do seem to wear out sooner than the front.
I haven't had a wheel bearing go bad since I started using RacingBrake 2 piece rotors on all 4 wheels--that's over two years. Two piece rotors prevent brake induced bearing heat soak. Brake heat cooks the bearing grease and leads to early failure.
Special Tools Needed: Large torque wrench for the 242 lb-feet axle nut, 36mm socket for the axle nut, impact screwdriver to remove the brake disk and a ball joint separator. If you don't want to take the knuckle to a shop to have the old bearing and hub pressed out you'll need a hydraulic shop press with press plates and assorted dies. Snap ring pliers. A Harbor Freight Bearing Separator Kit makes pulling the bearing off the hub easy, you can also cut it off or simply replace the hub. A deep socket for the axle nut is difficult to use in the front due to the placement of the axle nut next to the shock absorber. You may have to remove the front shocks to use a torque wrench and deep 36mm socket. This shallow, $8, 36mm impact socket works great on both front and rear axle nuts:
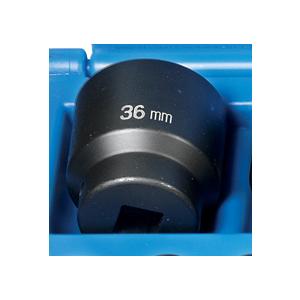
Shallow 36mm Socket $8 http://www.tooltopia.com/grey-pneumatic-2136m.aspx
Front Bearing Differences: To remove the front wheel bearing you remove a metal dust cap from the inside of the knuckle which will expose the 36mm axle nut and requires the same 242 lb-feet torque as the rear axle nut. Use a sharp chisel between the dust cap and ABS pulser to lift the dust cap. Rotate the hub and repeat until you open a gap all the way around the dust cap. Then you can use a screwdriver to spread the gap. To replace the dust cap use a plastic mallet. Rotate the hub as you hit it to make sure the dust cap goes in straight. It's easier to access the front axle nut with the wheel off. The front brakes are strong enough to hold the brake disk and hub while you torque it to 242 lb-feet. You can remove the knuckle first, then use an impact driver to remove the axle nut. You can leave the lower ball joint attached by removing the lower ball joint's base held in place by two 17mm bolts. They are torqued to 40 lbft. The steering arm ball joint gets 40 lb-ft.
I got the new hub and bearing from www.hondapartscheap.com for about $190. Honda Performance Development sells the hub for $98. The new hub came with 5 new lug bolts already installed in the hub. The wheel bearing is the same at all four corners of the car and they are available at most auto parts stores. I got a high quality Timken bearing from AutoZone for $36.
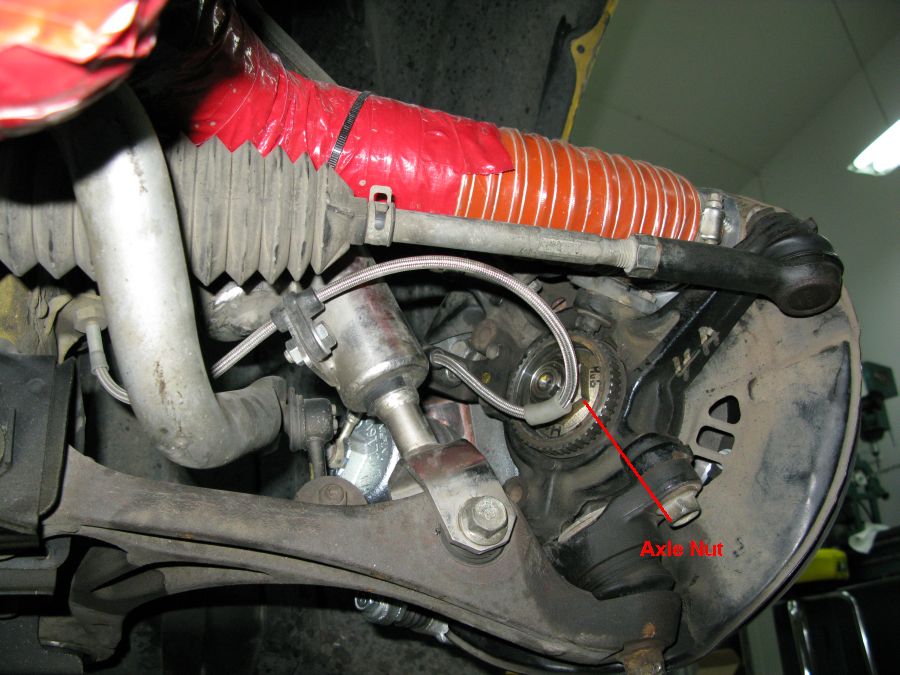
In the rear you want to loosen the axle nut while the car is still on the ground. Remove the wheel center cap to gain access to the axle nut. Next, remove the dent in the axle nut that locks it in place. A small flat chisel and hammer works well. Loosen the axle nut with an impact driver or a large 1/2 inch breaker bar and 36mm socket. One of mine was stuck pretty good so I drove the car to a local shop and they used their monster air impact wrench to break it loose. I then tightened it a little and drove home and completed the repair.
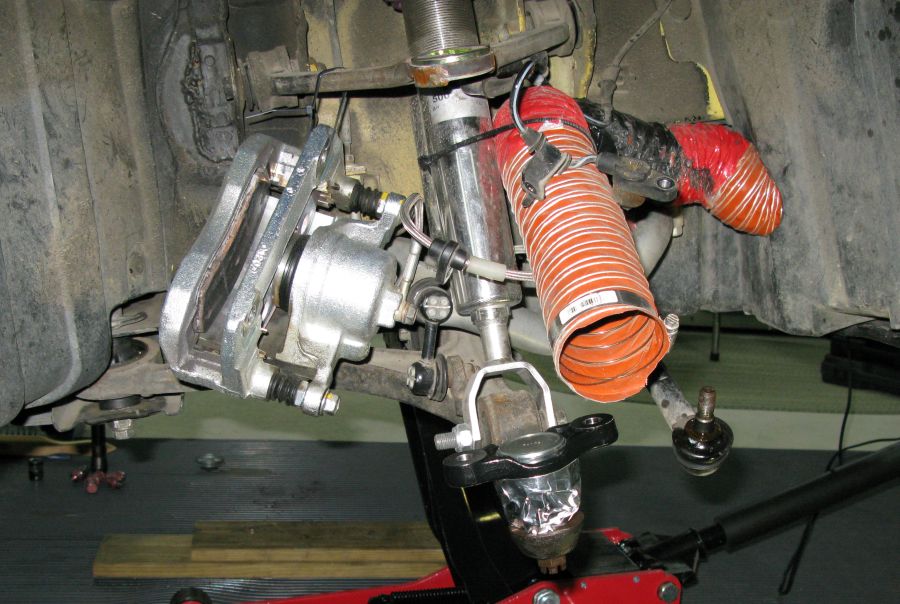
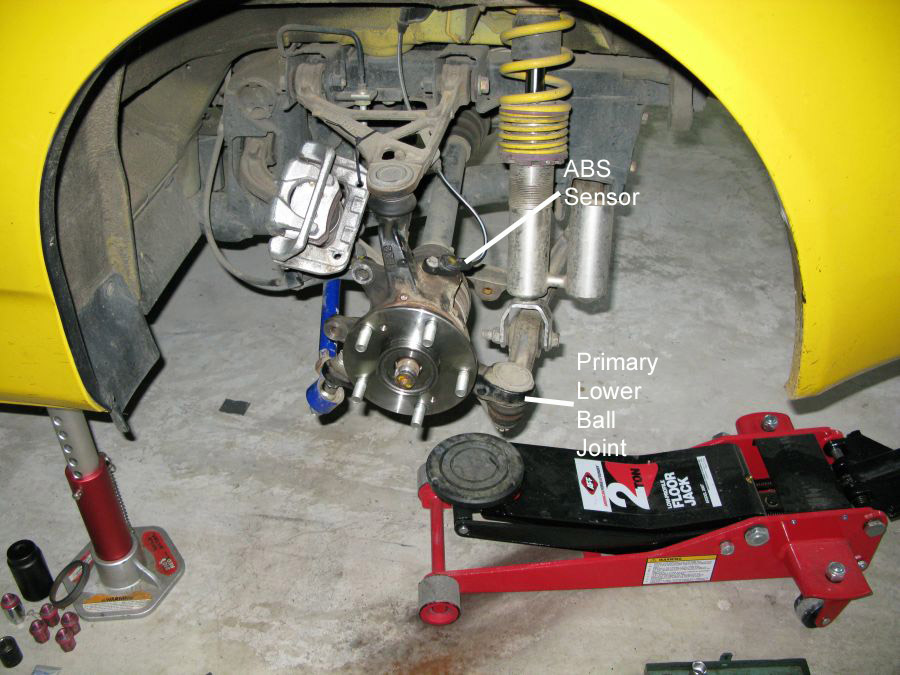
Slightly loosen the lug nuts, jack up and support the car, and remove the wheel. Remove the ABS sensor and ABS hub bracket (10mm bolts) before you pop the ball joints. Follow this how-to to remove the brake caliper and brake disk and pop the ball joints. You'll have to pop 3 ball joints to remove the knuckle.
Notes on Popping Ball Joints: Put some grease on the ball joint tool's threads and the part that slides under the ball joint grease boot to keep from tearing the boot. Make sure you go under the boot, you don't want to squish it. I like to put PB Blaster on the ball joint and let it soak in before popping it. It really seems to reduce the amount of force to pop them loose. It takes a crap-load of force to pop the ball joint and you'll probably think you're about to break the tool or the knuckle when it will finally pop. And I mean pop. When the first one goes it'll probably startle you, so be ready for it.
You can also leave the trailing arm ball joint on and unbolt it from the car (leaving it attached to the knuckle) but your alignment will change. By removing all 3 ball joints your alignment won't be affected. Jay Balducci wrote and said he damaged his OEM castle nuts when popping the ball joints so he suggest using a std M12x1.25 nut threaded onto each of the ball joints and have the nut fairly flush with the end of the ball joint. The nut will protect the ball joint's threads.
Popping the Ball Joints With $36 OTC 6297 Ball Joint Tool
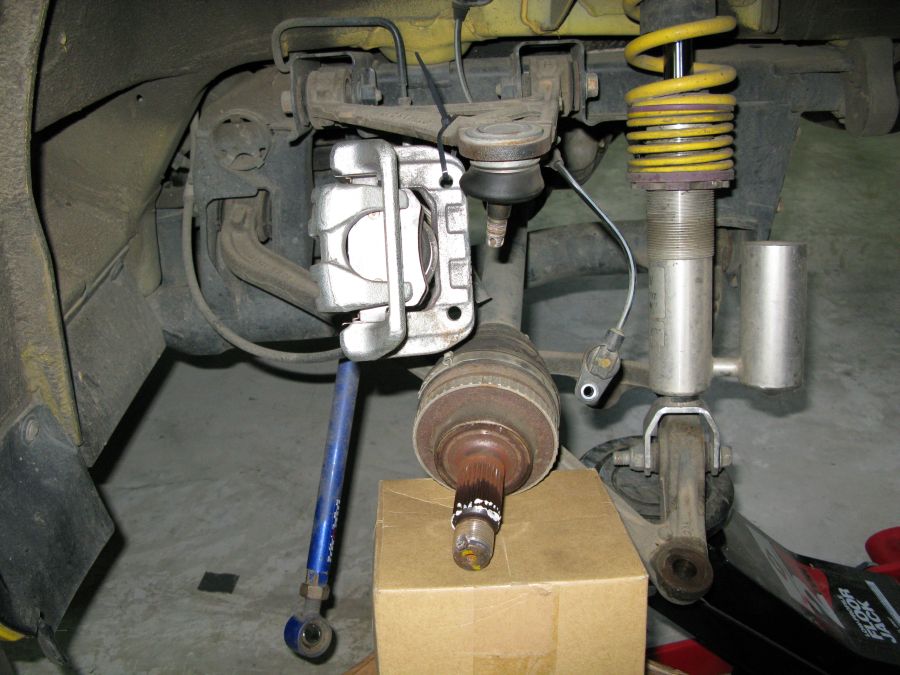
Save the top ball joint for last. While the knuckle is hanging by just the upper ball joint, begin to push the axle out of the knuckle using a plastic mallet. Pull the knuckle outward a little and knock the axle inward. A large wooden dowel works well to push it all the way out of the knuckle. Don't let the axle fall, use something to support it once you get it out of the knuckle. I used a cardboard box to hold it up.
Recommended Reading
Rear Knuckle Off and Axle Supported
Front Dust Cover Off to Expose Axle Nut
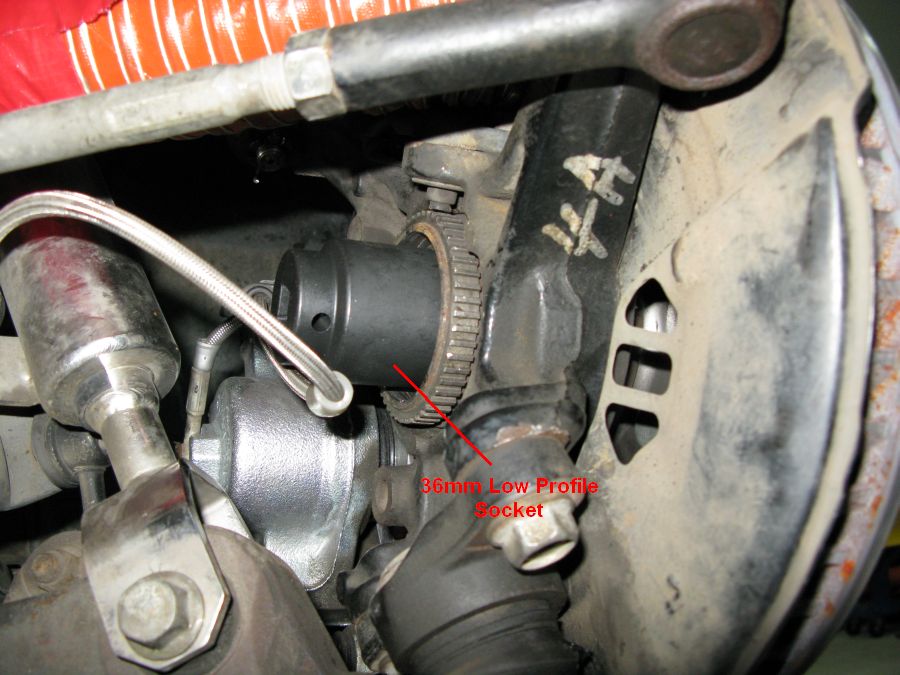
36mm Low Profile Impact Socket
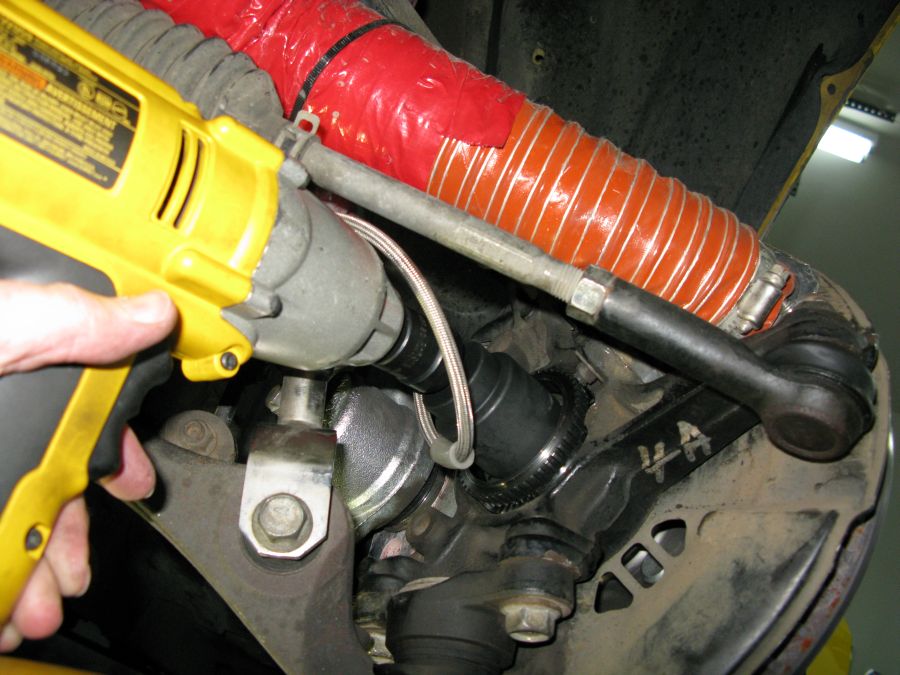
Impact Driver, Swivel, Socket to Remove Axle Nut
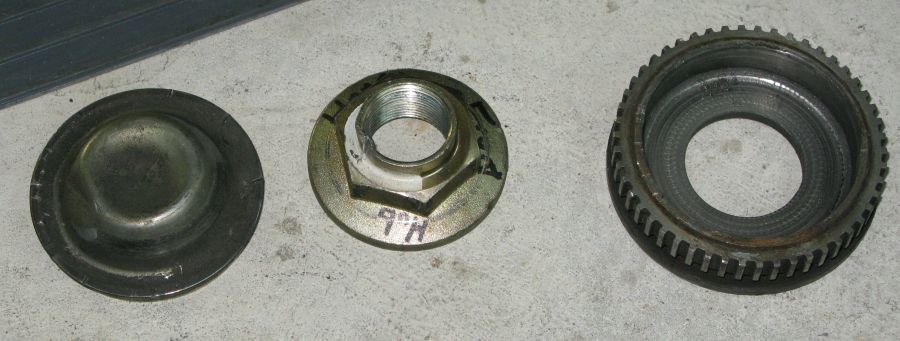
Front Dust Cover, Axle Nut, ABS Pulser
Front Knuckle Off
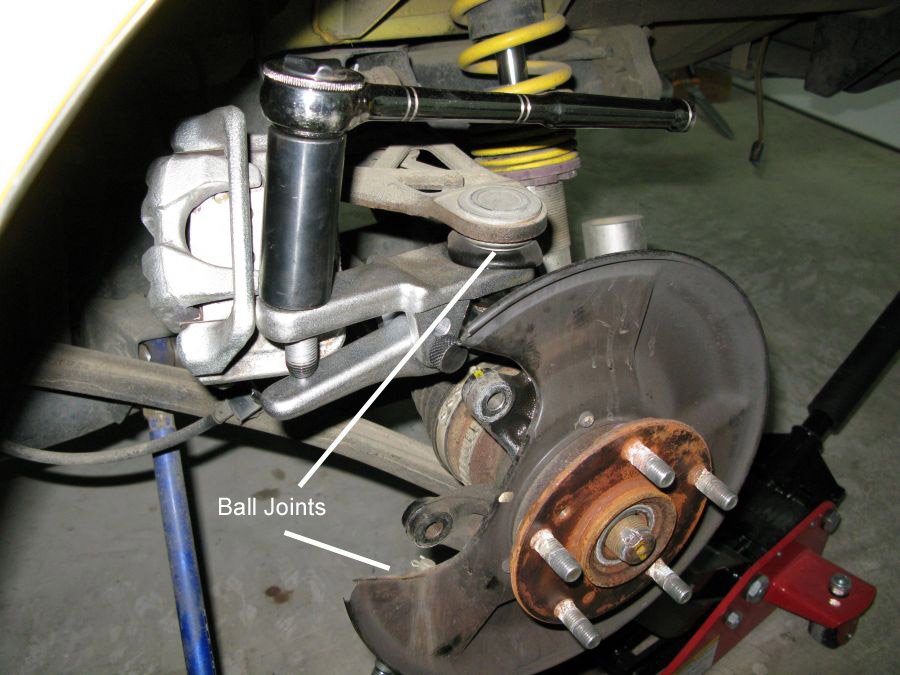
In the picture above you can see that I wrapped my front lower ball joint with aluminum tape. Both of my front lower ball joint rubber boots were heat damaged, even with the brake dust shield in place. The upper ball joints are far enough away from the brake disk so it will be ok with no tape as long as you run the dust shields. If you remove the dust shields you should tape all three ball joints to protect them from heat damage.
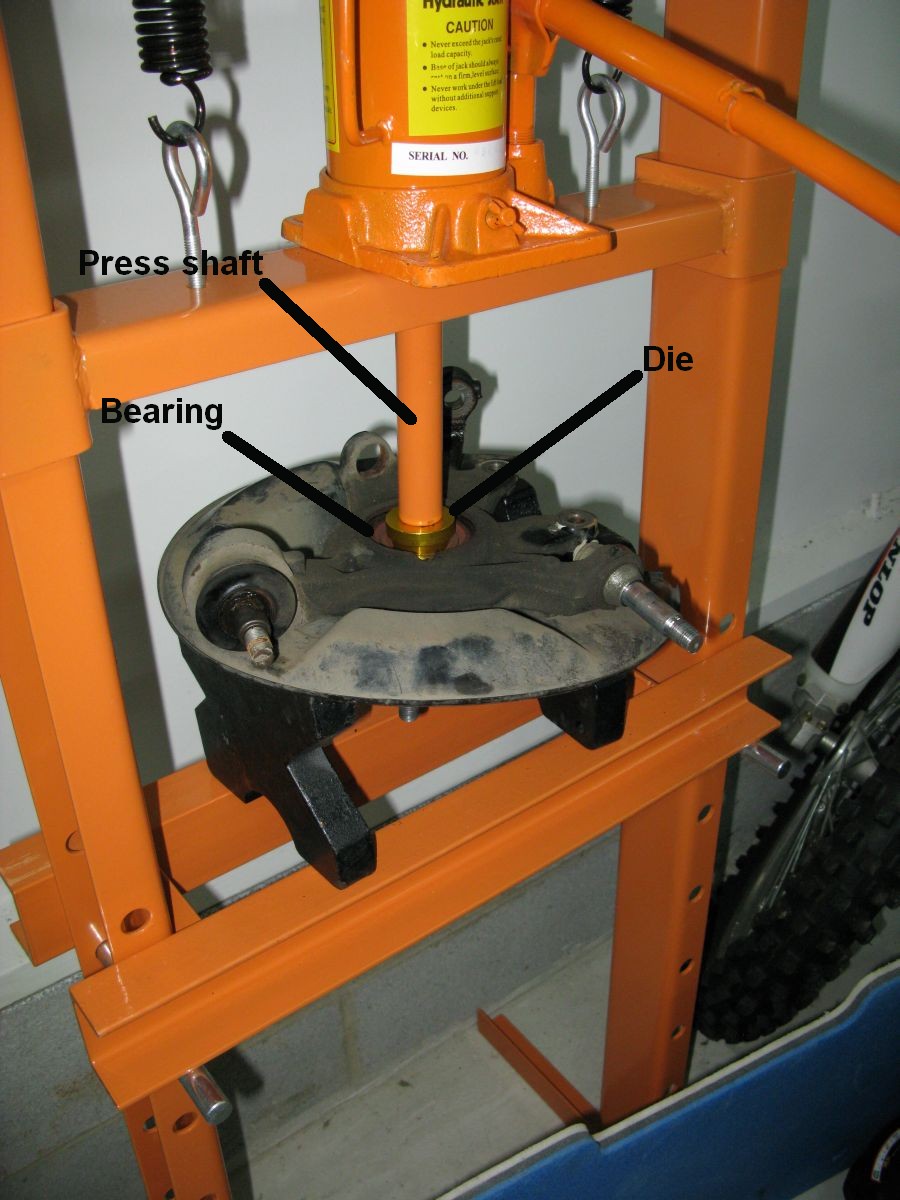
Most good size auto shops can press out the old bearing and hub and press in the new ones. Your local Honda dealer will do it for you too. I decided to do it myself and bought a 12 ton hydraulic shop press.
I used a set of Harbor Freight bearing press dies to go between the press's shaft and the bearings. I used a small one for the hub, medium to press out the bearing, and a larger one to press in the new bearing.
 Nigel says
be careful when operating an hydraulic press.
Nigel says
be careful when operating an hydraulic press.
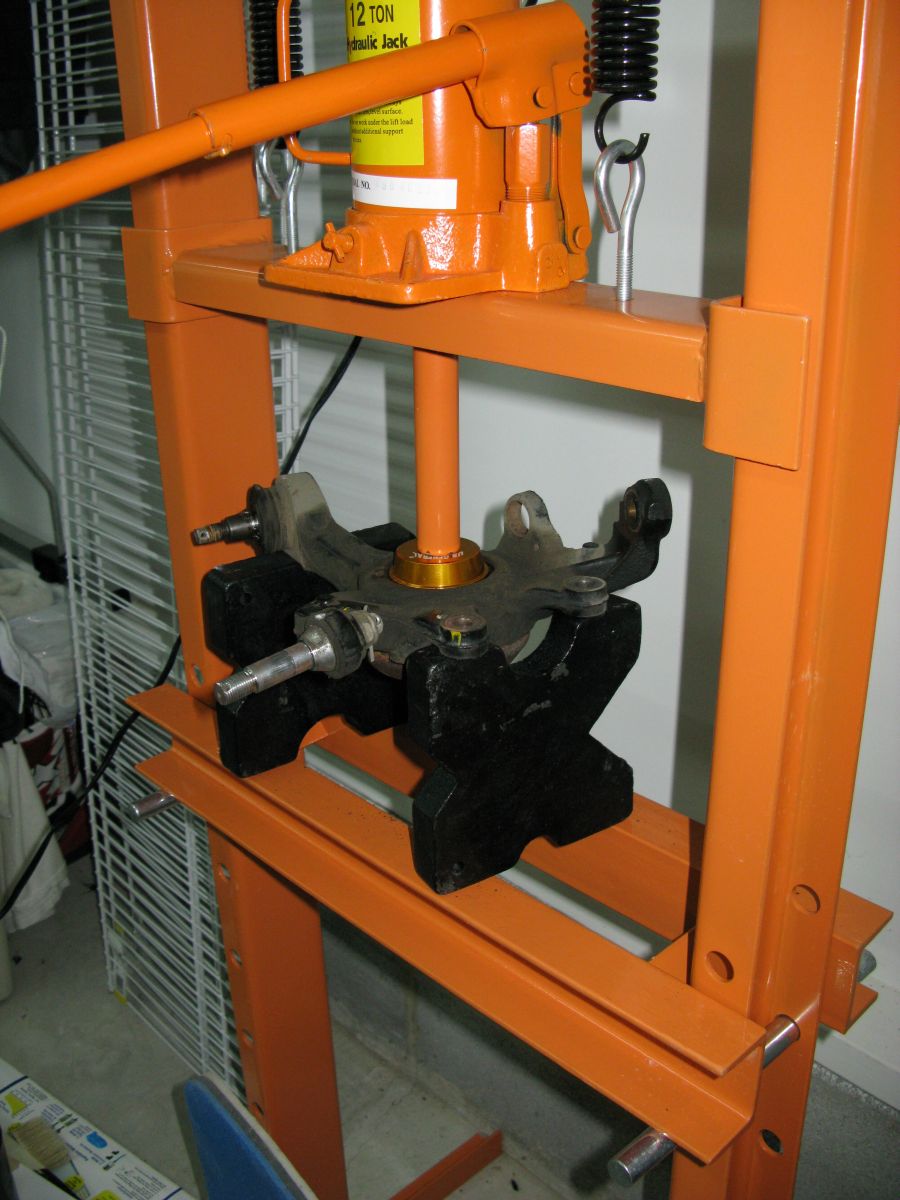
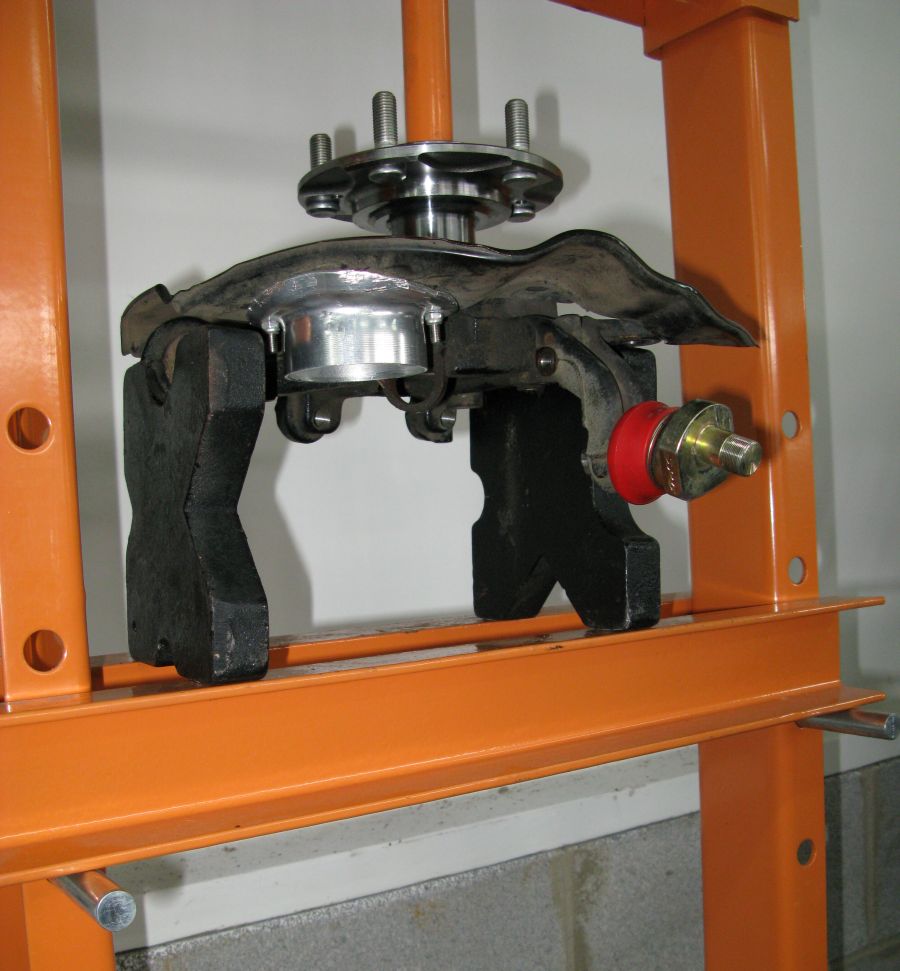
Pressing Out the Old Rear Hub
Another View of the Old Rear Hub
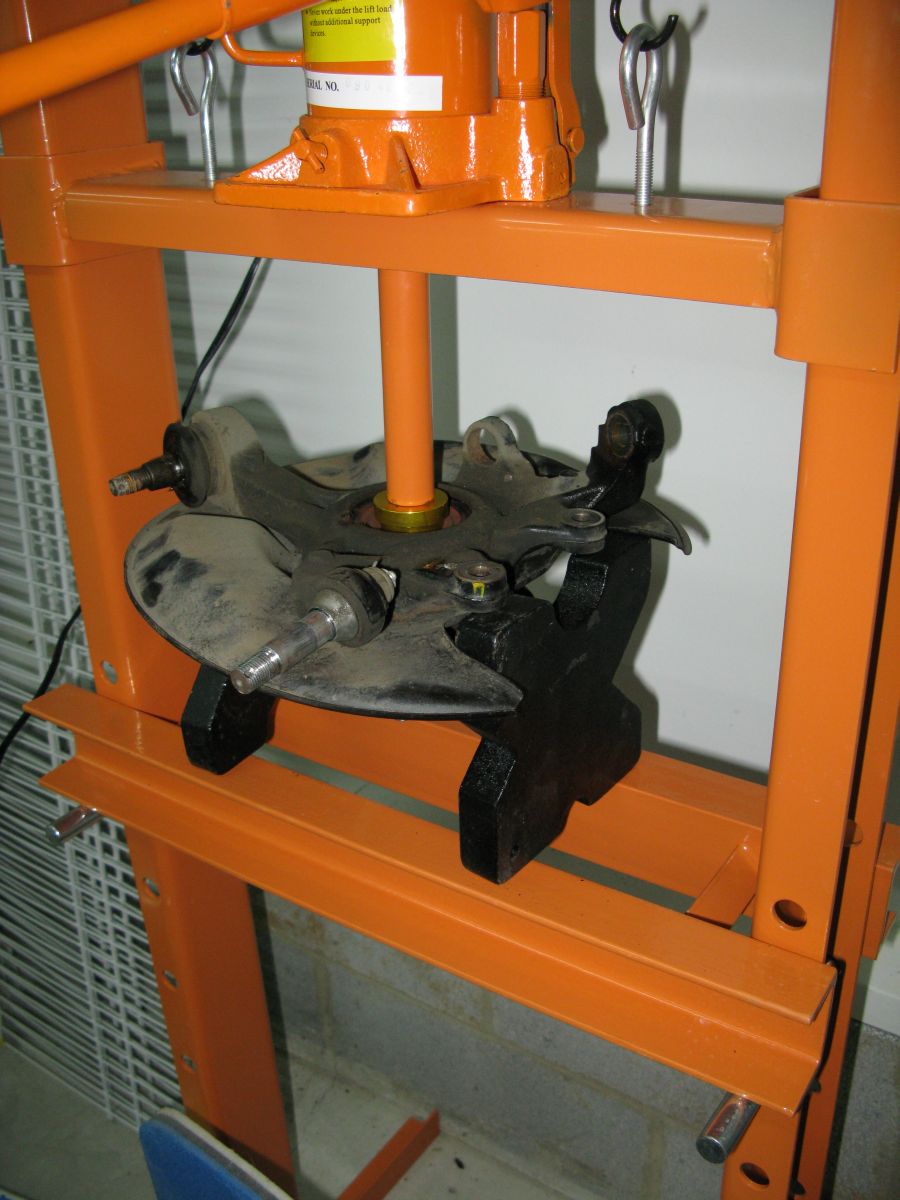
The X shaped support plates came with the shop press and worked well for supporting the odd shaped knuckle.
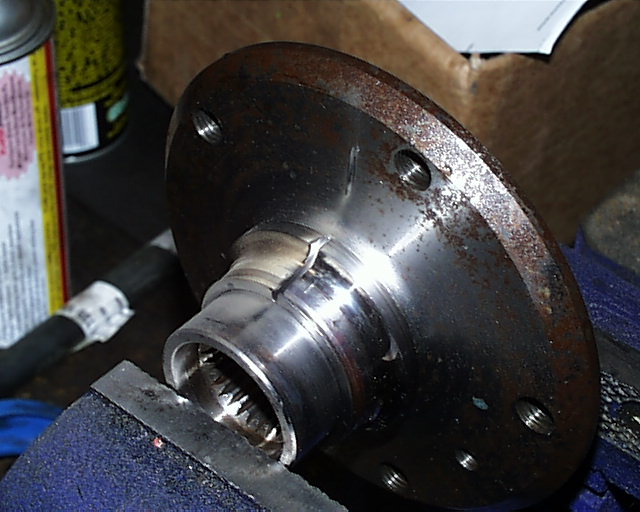
Here's how to remove the bearing race from the pressed out hub: eastcoastbumps says: Use a cut off wheel and zip right through the race. Be careful not to cut the hub. Then use an air chisel (or just a regular hammer and chisel) to cut through the last edge. Once its cracked it will slide off no problem. Harbor Freight has a nice Bearing Separator Kit for pulling the bearing race off the hub.
Cut the Old Bearing Race Off with a Cut-Off Wheel & Chisel
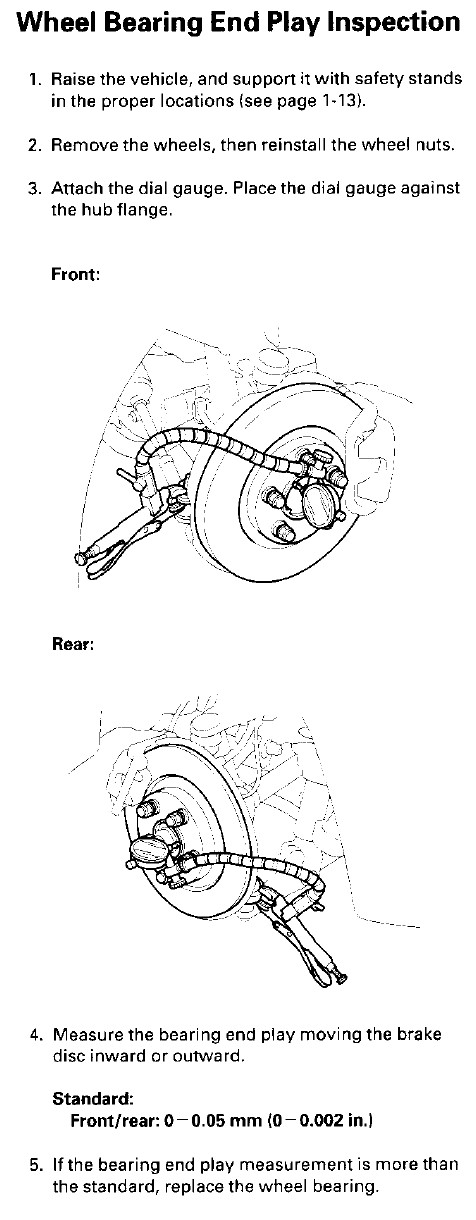
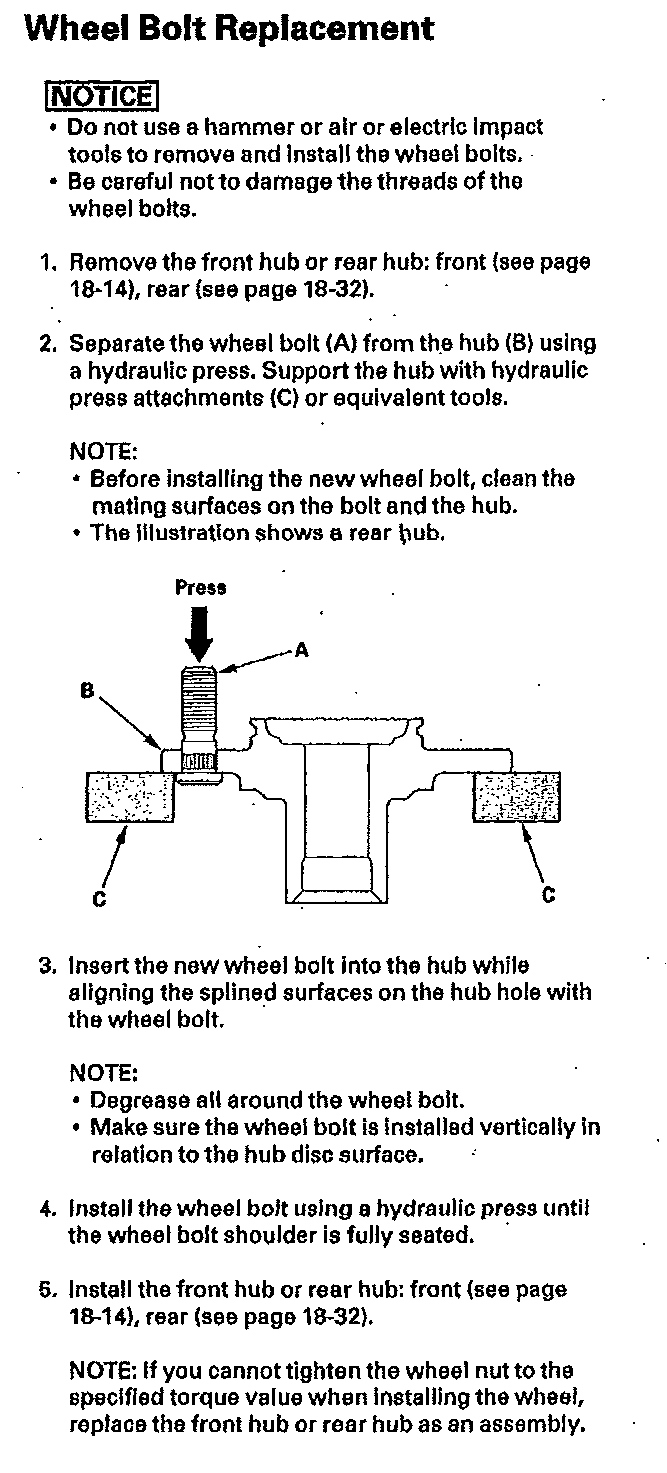
Shop Manual on Wheel Lug Replacement
Harbor Freight Bearing Separator
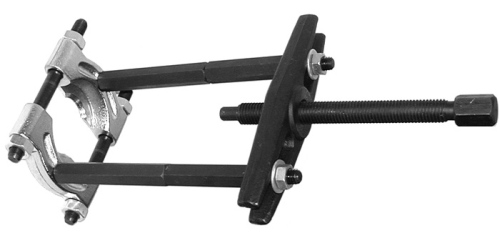
Clamps behind the bearing and pulls it off the hub.
With the hub out it's time to remove the "big ass" snap ring that holds the bearing in place.
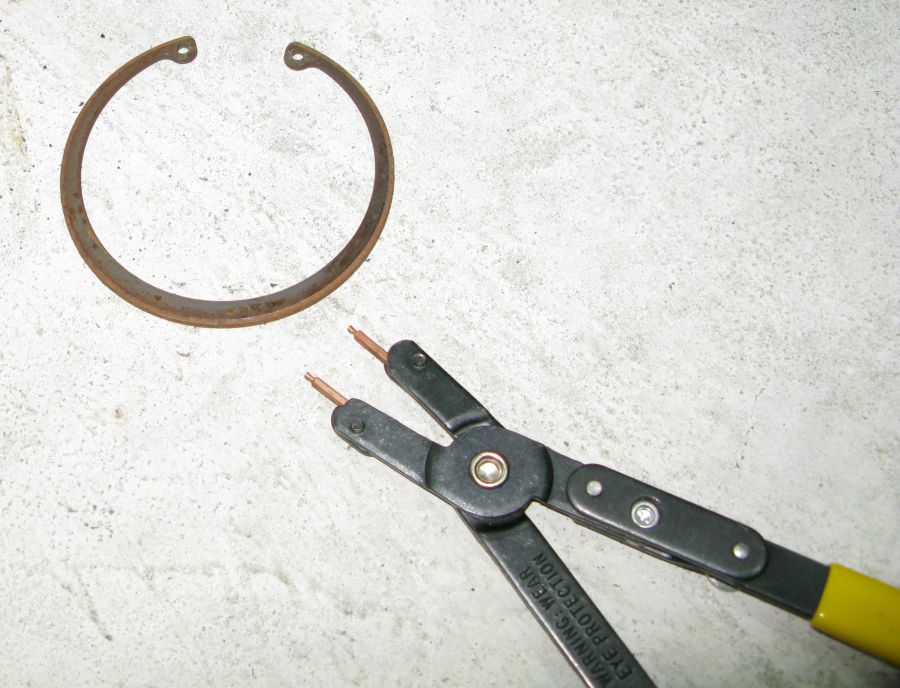
Removing the (big-ass) Bearing Retainer Snap Ring

Snap Ring and Snap Ring Pliers
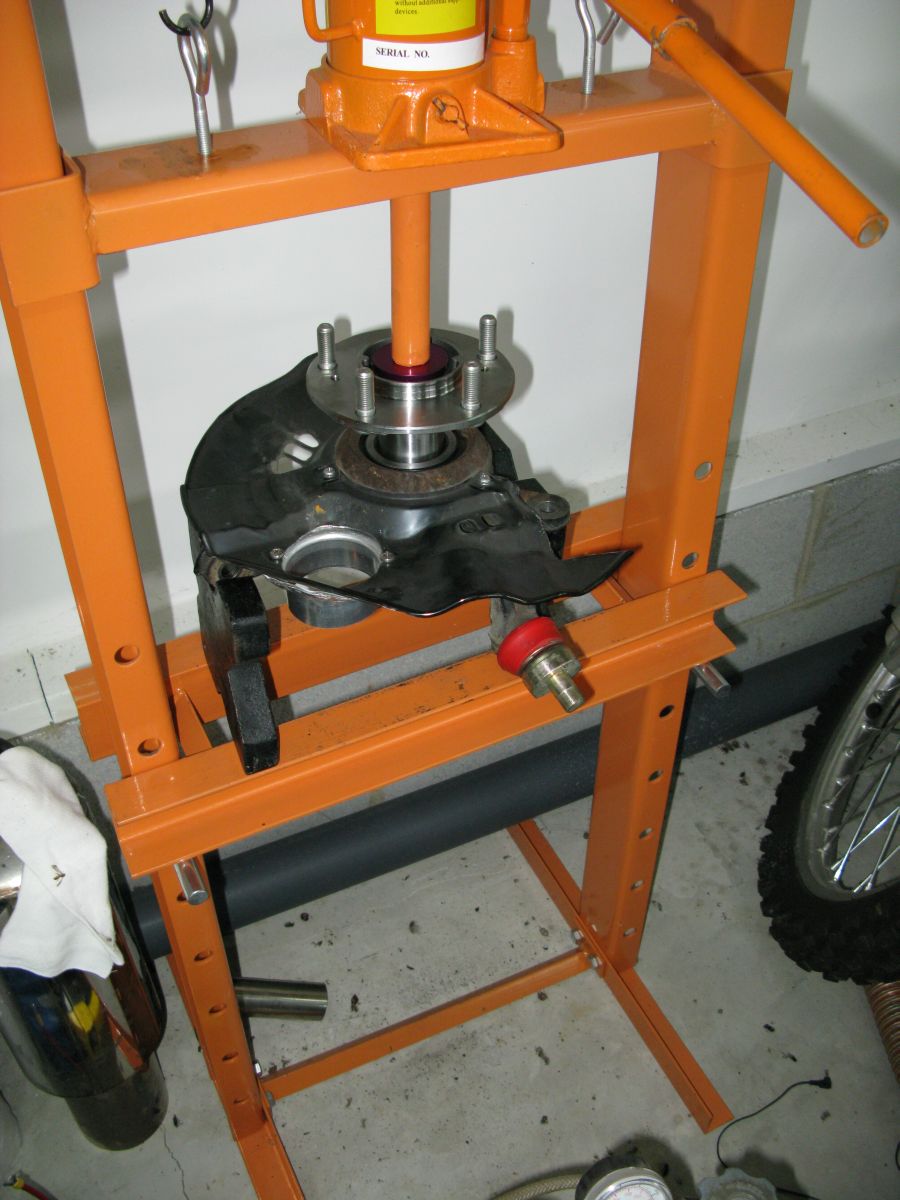
It makes it much easier to set up the knuckle if you remove the brake dust shield. You may need to use an impact screwdriver to remove the shield screws but my three Phillips head screws came out with a standard screwdriver. I did not reinstall my dust shields to increase airflow to the brake disks.
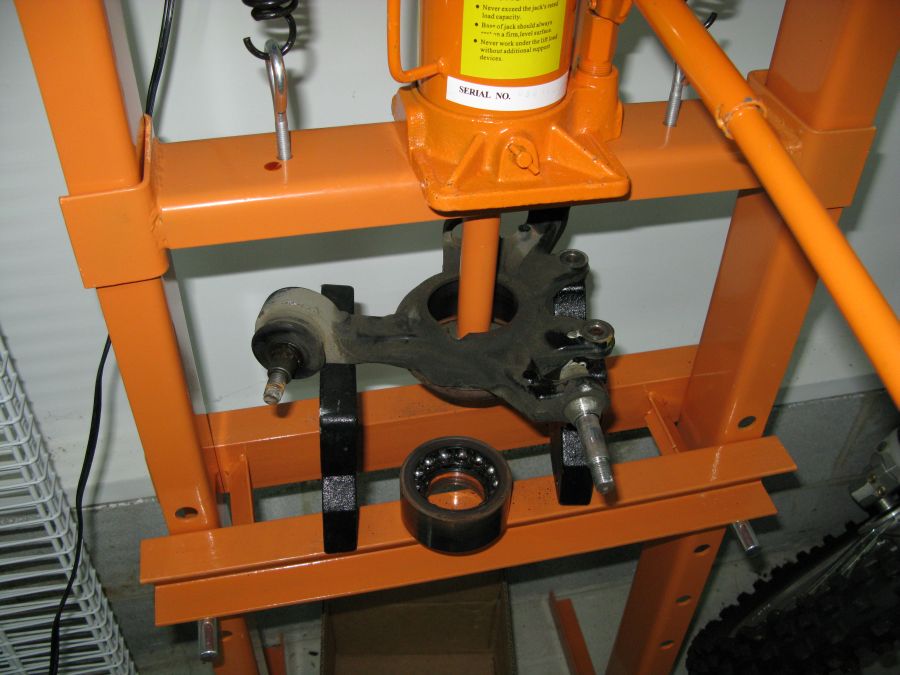
Pressing Out the Rear Bearing
Bearing Coming Out
Bearing Out
With the old bearing out clean the inside of the knuckle with WD-40 to make installation easier. If the old hub is in good condition it can be reused, but usually they are damaged when the bearing goes bad. To re-use the old hub you'll have to use a bearing separator or a rotary cutting tool to get the outside bearing race off the hub. The safe and easy way is to get a new hub when you order the bearing.
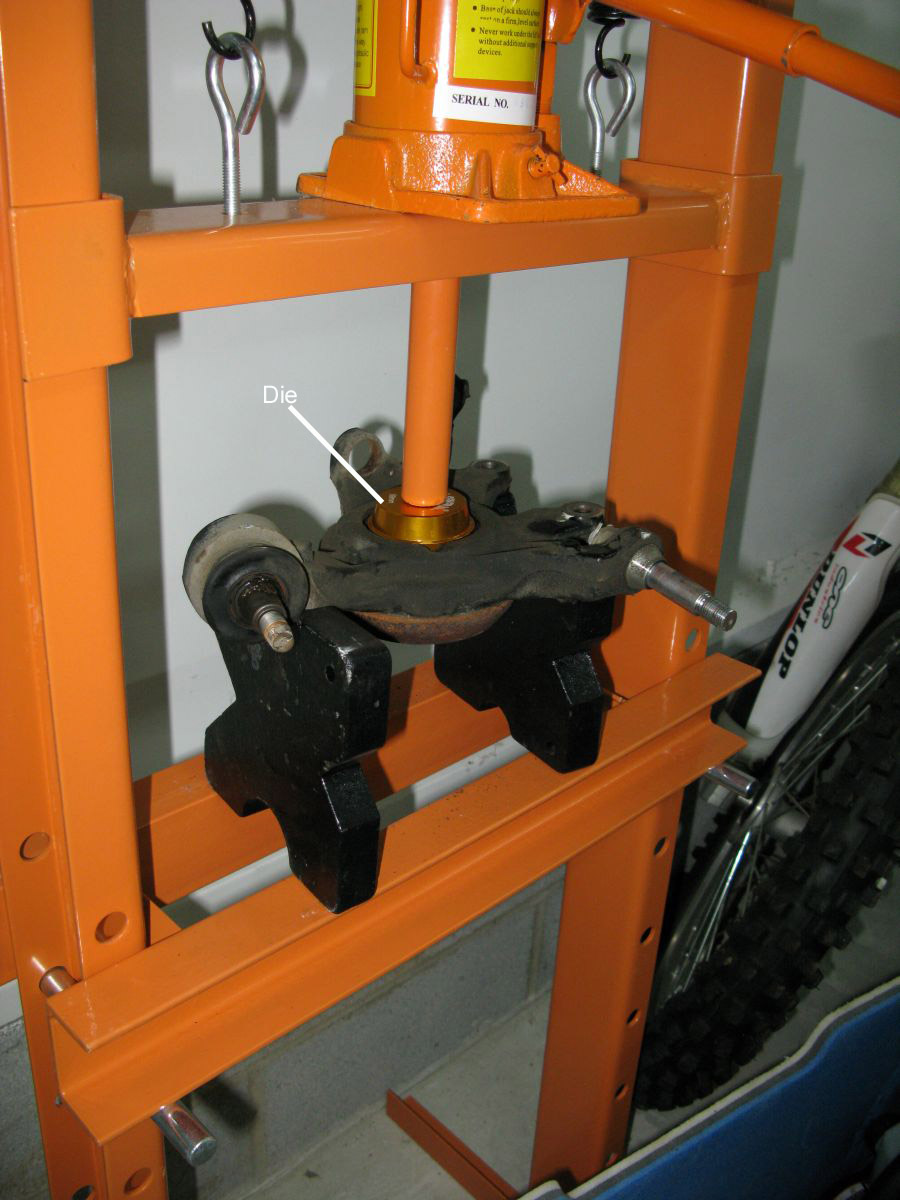
Pressing New Rear Bearing In
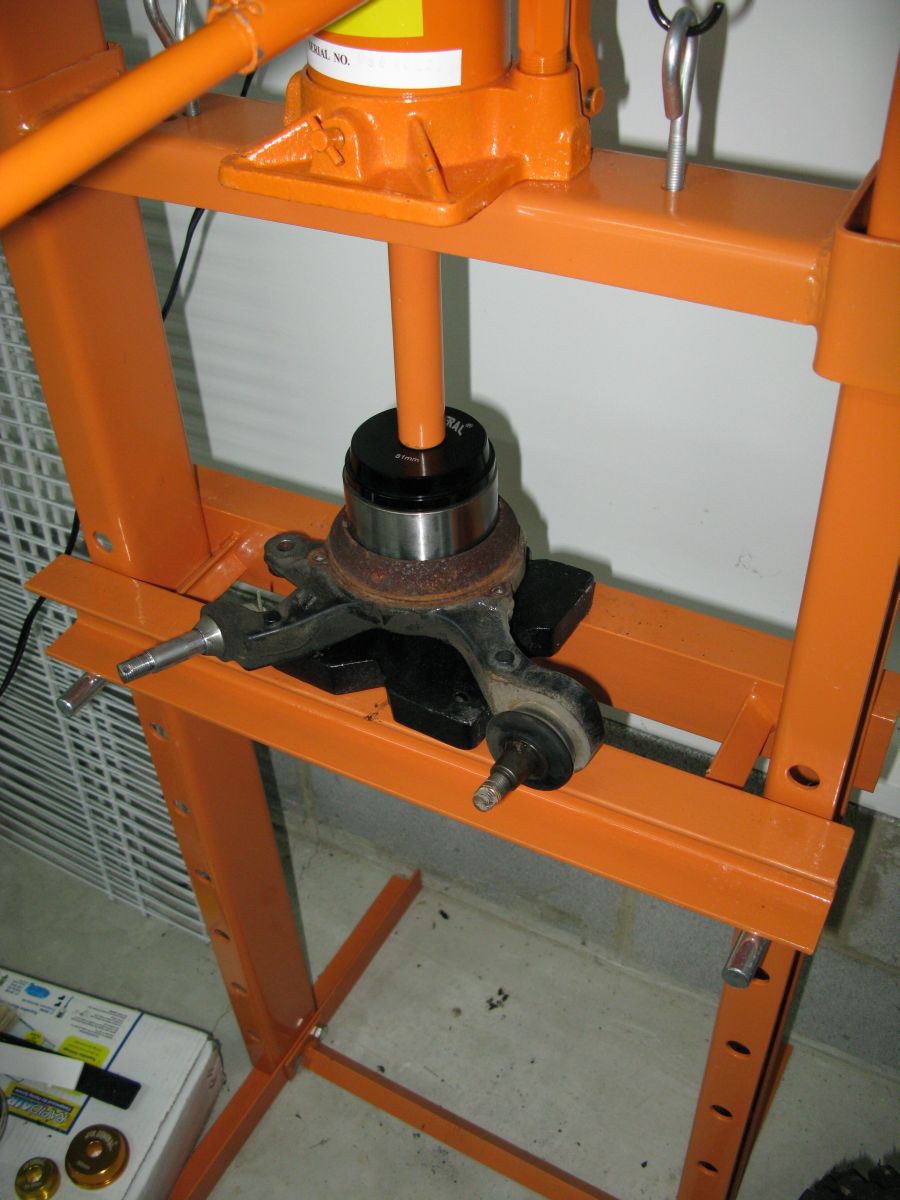
I'm using a die to press in the new bearing but you can place the old bearing on top of the new bearing to keep from damaging it.
Make sure you have the rubber seal side of the new bearing in the up position, then press it into place. Make sure you're pressing the outer ring of the bearing, you'll damage the bearing if you put pressure on its inner race. You can put the old bearing on top of the new bearing and use it to press the new bearing into place. Position the knuckle so it's as horizontal as possible. You don't want to put a side force on the bearing or hub when you're pressing it in. My X shaped press plates had a nice indention that fit the lower ball joint arm perfectly (see pics). You'll probably have to play around with the knuckle's placement to get it just right.
Bearing Fully Seated
With the bearing fully seated reinstall the snap ring (don't forget to do this before you press the hub in!) and you're ready to press in the new hub. If you are replacing your wheel lugs remember to do it before you install the hub!
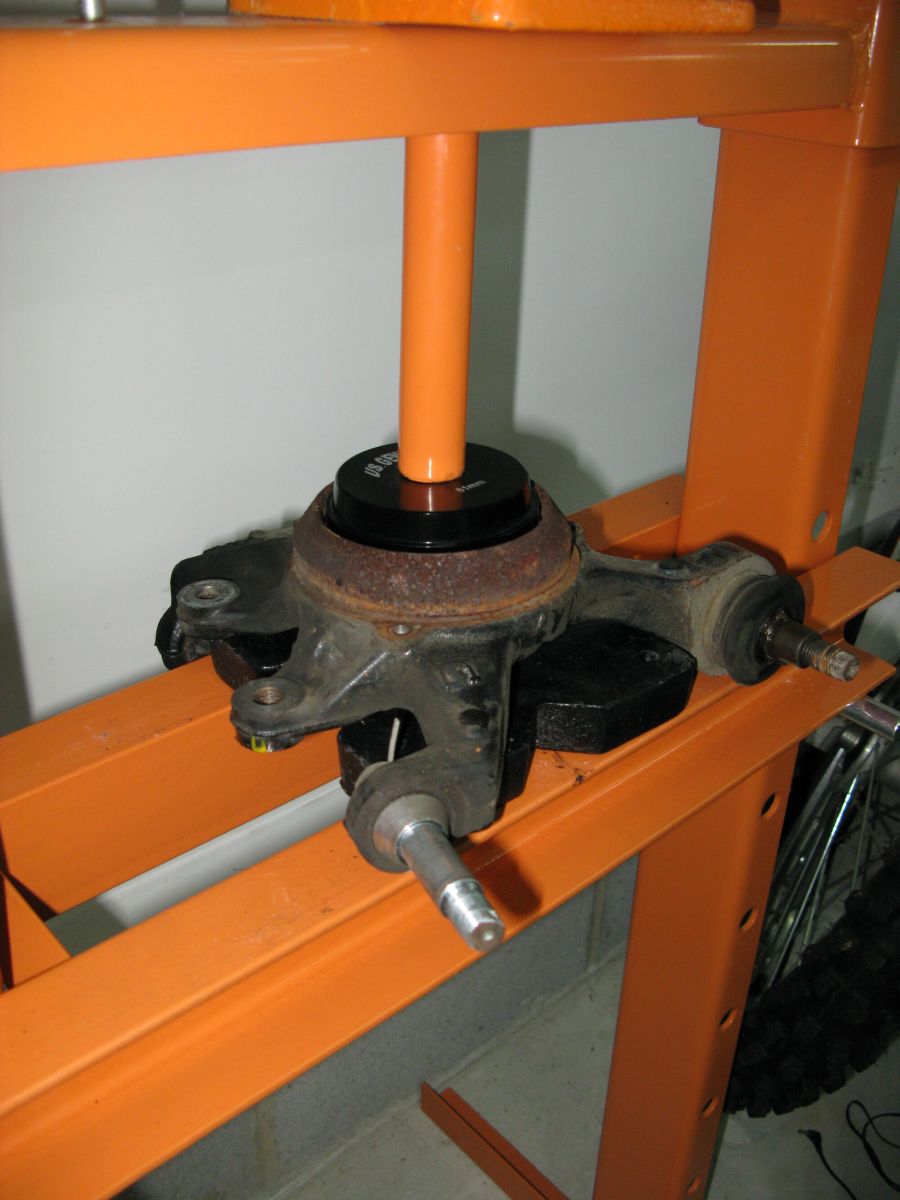
With Snap Ring in Place the Rear Hub is Ready to Be Pressed In
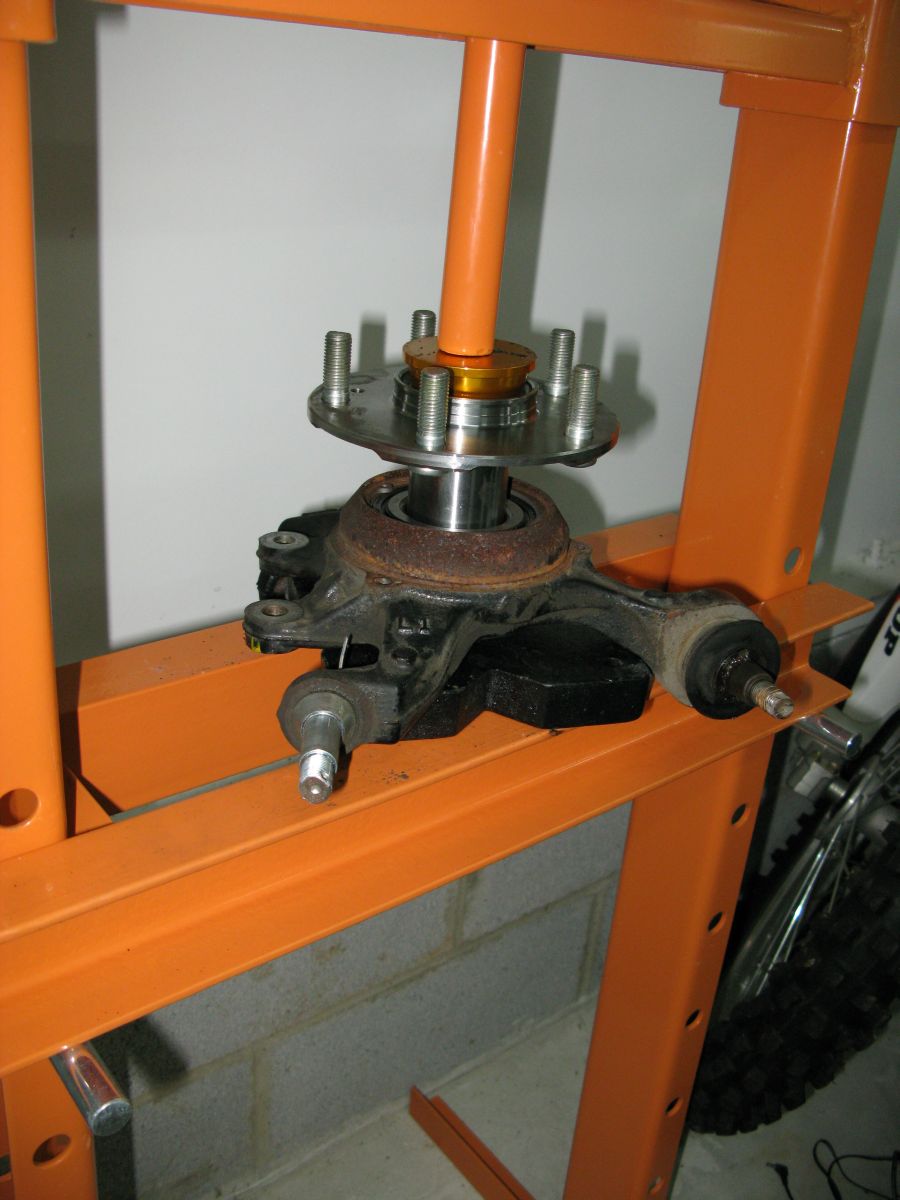
CORRECTION: The bearing's inside race must be supported from below as you press in the new hub. The old bearing's inside races can be stacked to support the new bearing's inside race. You do not want to support the knuckle as shown in this and the following pics. Thanks to Billman250 for the correction.
Hub Going In
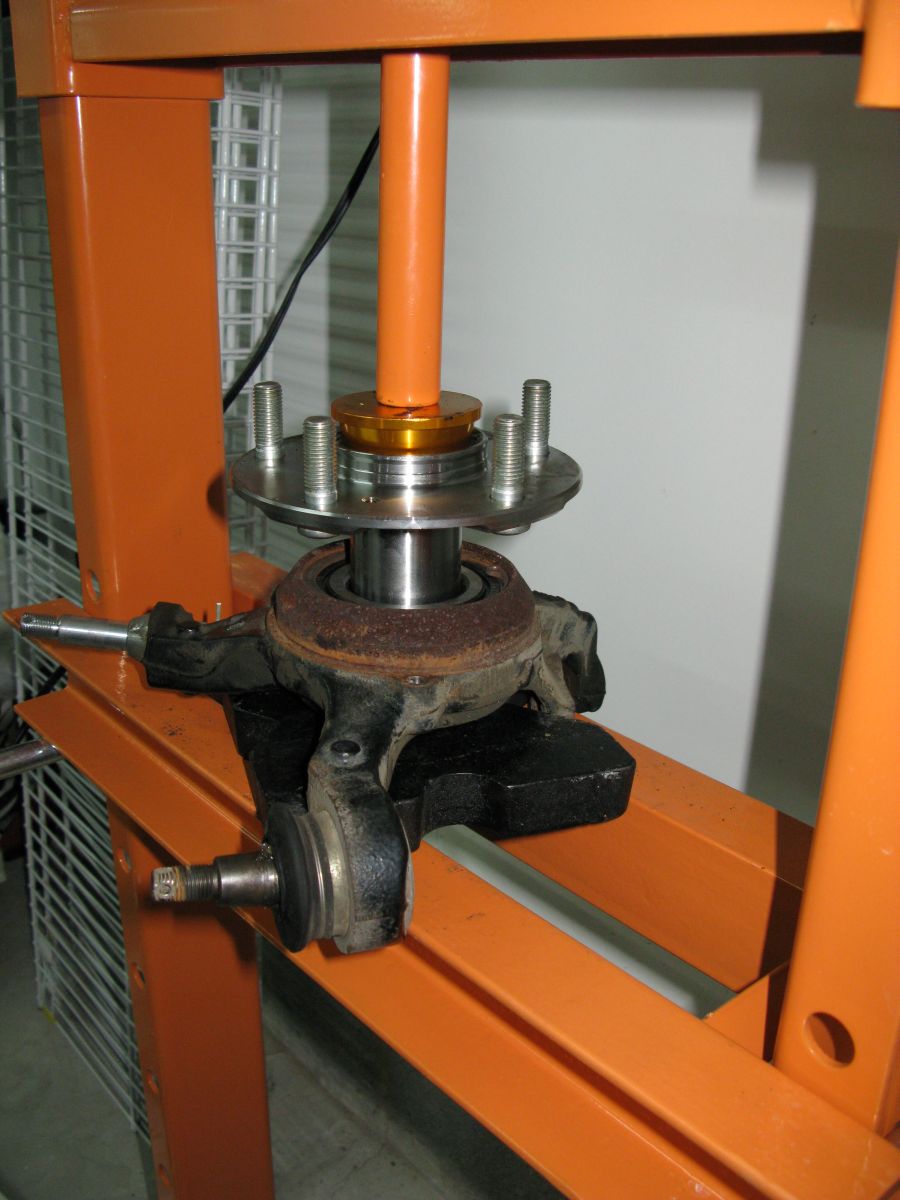
CORRECTION: The bearing's inside race must be supported from below as you press in the new hub. The old bearing's inside races can be stacked to support the new bearing's inside race. Thanks to Billman250 for the correction.
Hub Fully Seated
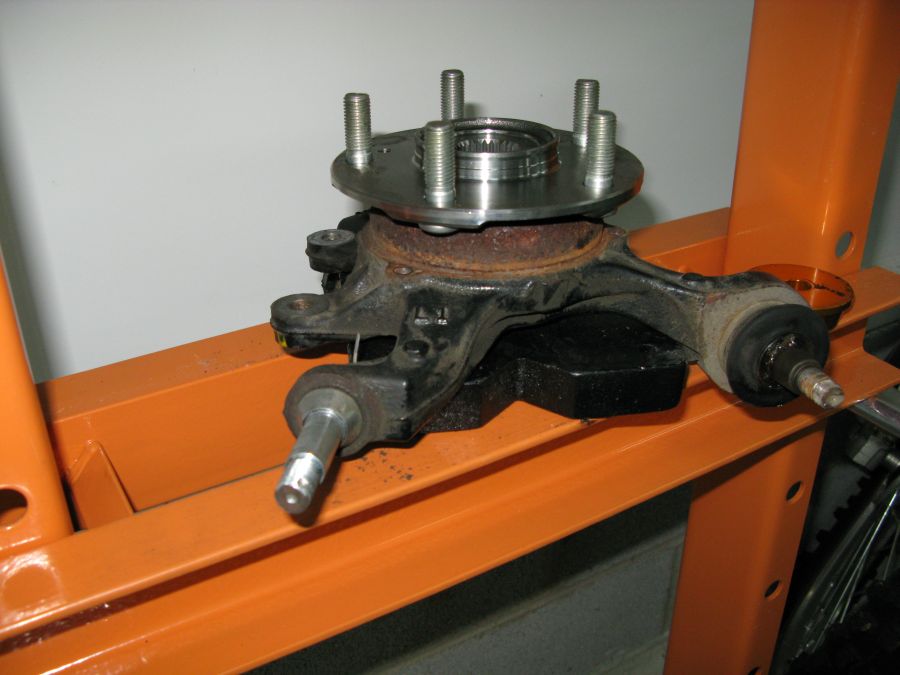
CORRECTION: The bearing's inside race must be supported from below as you press in the new hub. The old bearing's inside races can be stacked to support the new bearing's inside race. Thanks to Billman250 for the correction.
Right Front Hub Pressing In
CORRECTION: The bearing's inside race must be supported from below as you press in the new hub. The old bearing's inside races can be stacked to support the new bearing's inside race. Thanks to Billman250 for the correction.
Another View of Front Hub
CORRECTION: The bearing's inside race must be supported from below as you press in the new hub. The old bearing's inside races can be stacked to support the new bearing's inside race. Thanks to Billman250 for the correction.
Press the hub all the way in, you'll feel a definite resistance when it hits bottom. With the hub installed it's time to reinstall the knuckle. Put a little grease on the axle splines to ease the insertion into the hub. Put a little grease on the non-threaded part of the ball joint shafts. Slide the axle into the hub, then hang the knuckle from the upper ball joint. Don't tighten any of the ball joints until you get all three back in place. You may need to use a jack to raise the lower suspension arm to get the 3 ball joint bolts back on.
Put some motor oil on the face of the axle nut (the part that will contact the hub--the service manual actually says to do this) and put it in place but don't tighten yet. Tighten the upper and trailing arm ball joint nuts to 36 - 42 lb-feet. Torque the lower primary ball joint nut to 46 - 52 lb-feet. Install the ABS sensor and torque to 7 lb-feet.
Rear Knuckle & Hub Back in Place
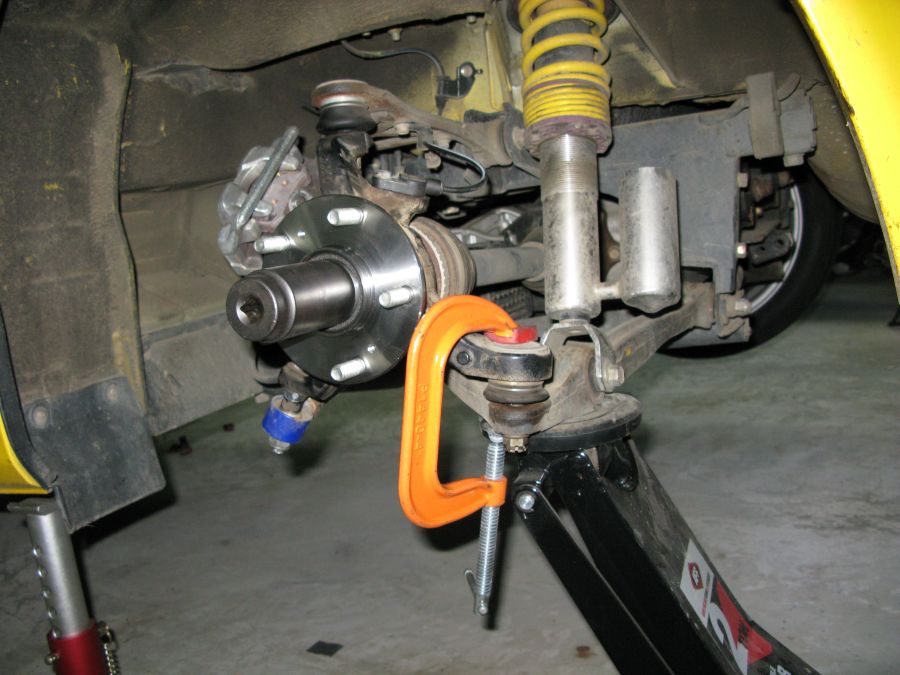
My lower primary ball joint began to spin while I was trying to tighten its nut. I used a c-clamp to put some pressure on it so it wouldn't spin.
Spinning Ball Joint Fix
Rear Knuckle With New Hub & Bearing In Place
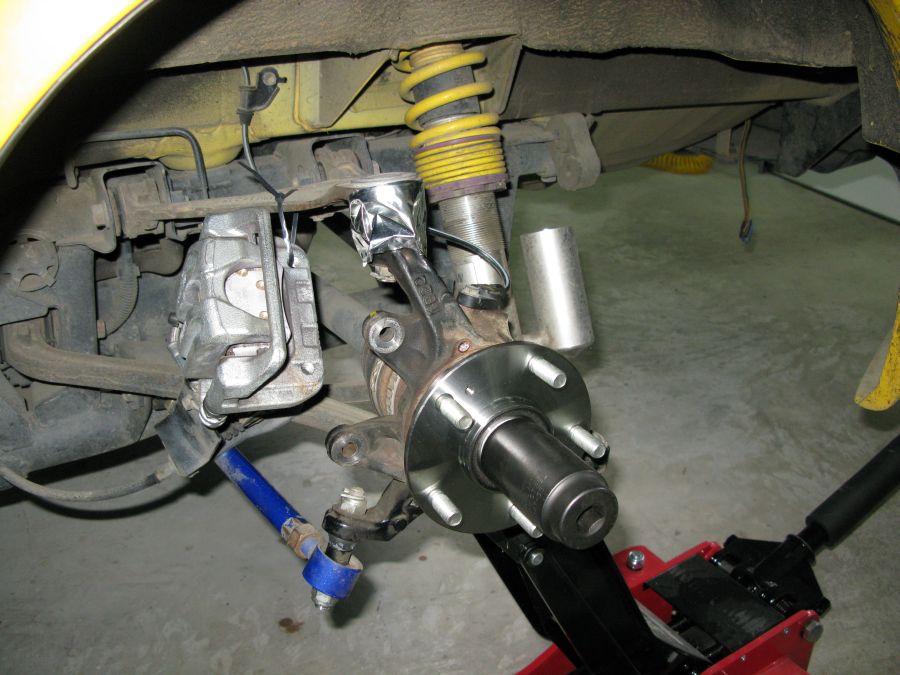
Since I left the brake dust shields off I put some aluminum tape around the ball joint boot to keep it from melting from track induced heat soak.
Reinstall the cotter pins on the ball joint castle nuts. You may have to turn the nut a little to make it line up with the bolt hole.
Follow the Brake Caliper & Disk how-to to reinstall them.
Front Hub: It's easiest to tighten the front axle nut with the wheel still off the car. To make access to the front left axle nut easier turn the steering wheel full left. Use a shallow 36mm socket and torque it to 242 lb-ft while someone holds heavy pressure on the brake pedal. Remember to stake the nut before replacing the dust cover. To replace the dust cap use a plastic mallet. Rotate the hub as you hit the dust cap to make sure it goes in straight.
Reinstall the wheel and torque the lug nuts to 80 lb-feet.
Rear Hub: Lower the car enough so that the wheel won't turn while tightening. Torque the axle nut to 242 lb-feet and stake the nut (dent the locking collar).
I've had three rear and one front wheel bearings go bad in the last two track seasons so I'm going to upgrade the rear brakes to two-piece rotors which will reduce the heat transfer from the rear brakes to the hub.
Have a beer and revel in the $300+ savings from doing it yourself.
Rob Robinette