S2000 Front Bump Steer Kit Install
By Rob Robinette
When a car is lowered the steering arms have to arc upward to the knuckle. Since front wheel camber changes with suspension movement the steering will work best when the steering arms are near horizontal. The Megan Racing S2000 Front Bump Steer Kit consists of two shims that raise the steering rack to correct the steering arm angles and get the wheels' camber curve back to stock. There were no instructions included in the kit.
After doing a couple of track days with the kit installed I haven't notice a difference in handling. I installed this kit because it was cheap and easy and I was already taking NASA PTB points for the rear bump steer kit I have installed.
Assuming your car was aligned after it was lowered, shimming the steering rack will change the front wheels' toe setting so you will need a front end alignment after the installation. If you install the kit at the same time you lower the car your alignment should stay pretty close to the same.
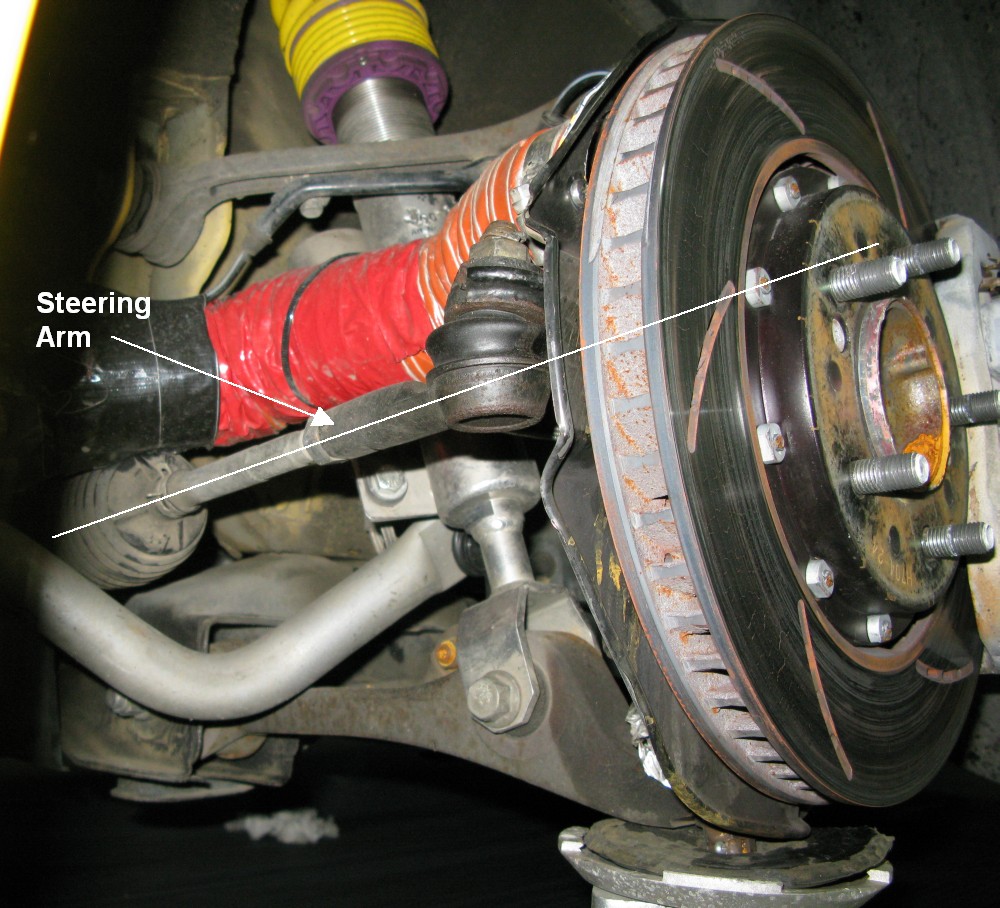
Notice Angle of Steering Arm On My 1 inch Lowered AP1 S2000 Before Adding Bump Steer Kit
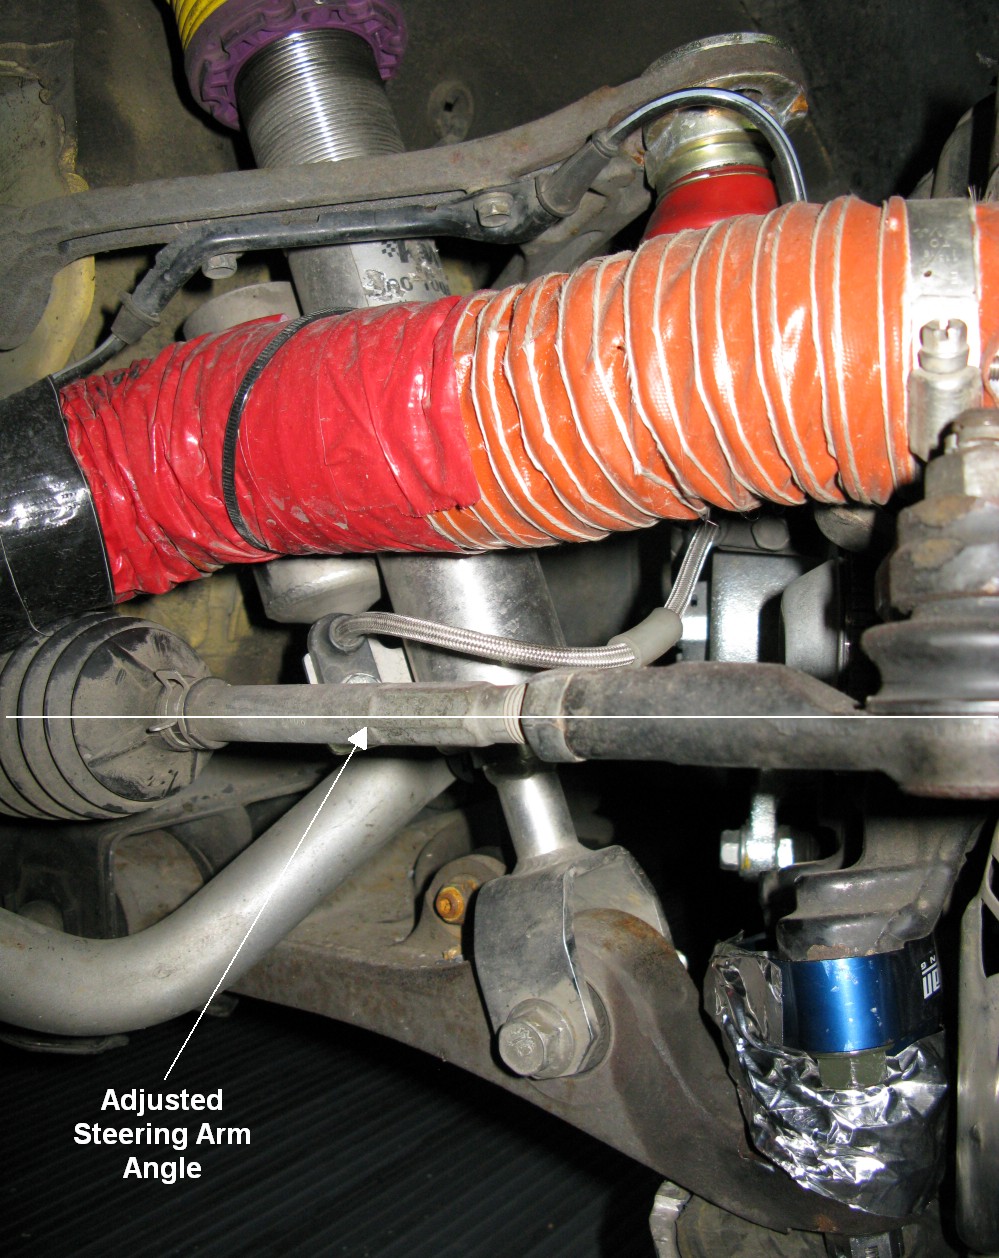
Steering Arm Angle After Bump Steer Kit Install
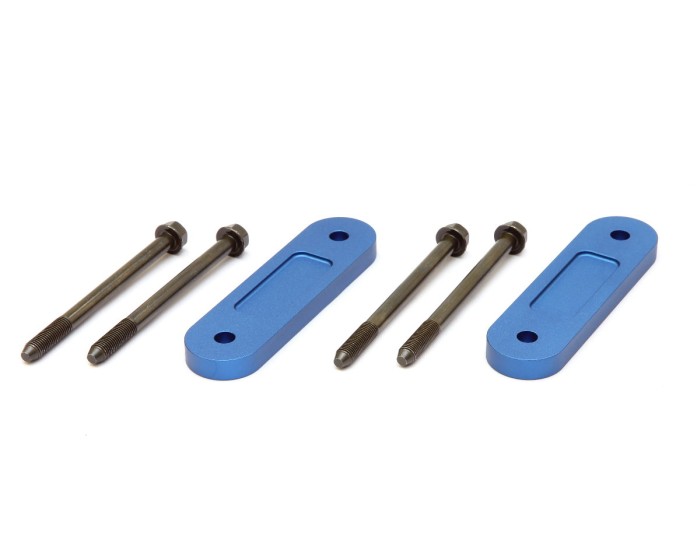
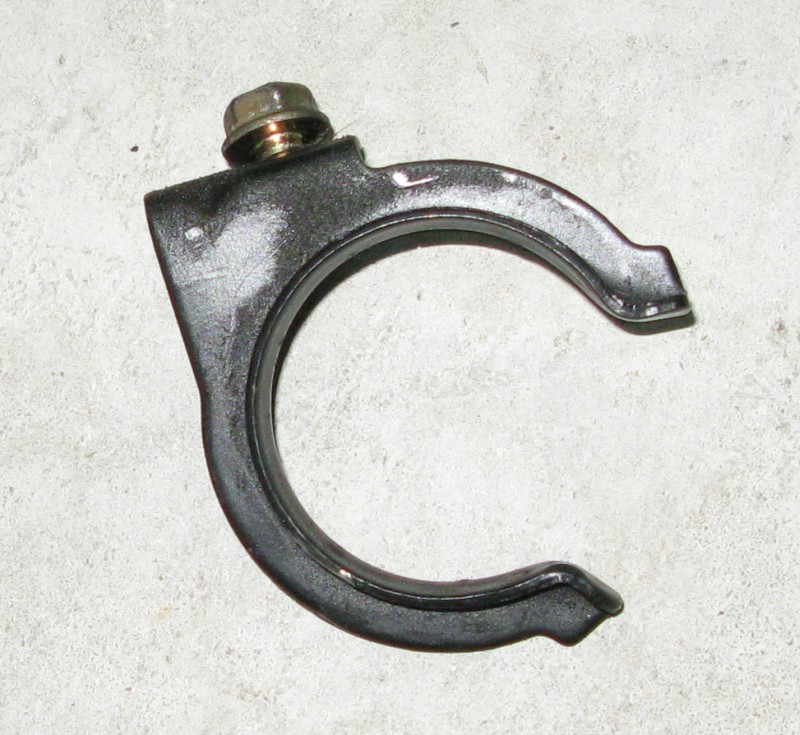
Megan Racing S2000 Front Bump Steer Shim Kit
Tools Needed
11/16 socket for a slightly loose fit on the new steering rack bolts
17mm socket for the new steering rack bolts
14mm socket for the stock steering rack bolts
10mm socket for the lower radiator hose support bracket
Swivel socket for the front steering rack bolts
About 3 feet of extensions to reach the two passenger side rack bolts if you leave an aftermarket air intake in place (won't be necessary if you remove the stock air box)
Liquid Wrench or PB penetrant helps with the steering rack bolt removal
Installation
You'll need to remove the stock air box to get to the passenger side steering rack bolts. I have an aftermarket intake installed so it was fairly easy to reach all the bolts without removing anything.
Spray some Liquid Wrench or PB penetrant on the 4 steering rack bolts.
I used a 14mm socket, a swivel socket and two long extensions to reach the 4 steering rack bolts. An impact wrench made quick work of them. Remove the bolts and washers.
Removing 14mm Steering Rack Bolt - Front Driver's Side
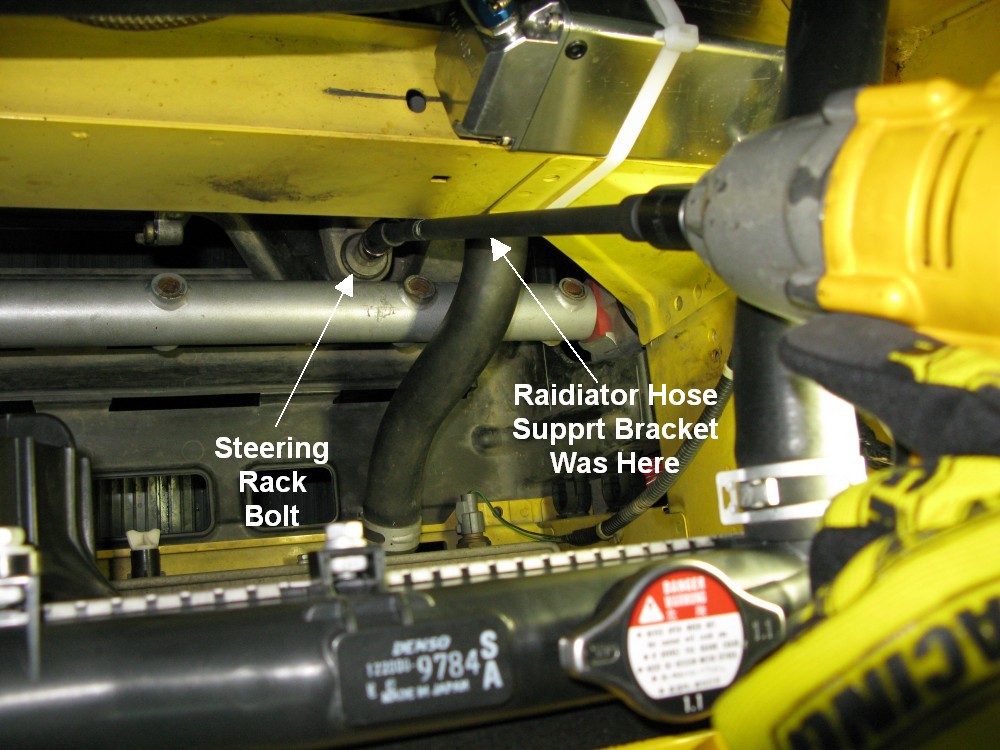
I had to loosen the 10mm bolt that holds the lower radiator hose support bracket in place above the steering rack. It will interfere with the driver side front steering rack bolt. Squeeze the hose and push it out the driver side of the support to get it out of the way and loosen the bolt a few turns until the support is loose enough to turn it 90 degrees. This will get it out of the way. Don't remove the 10mm bolt, it's a bitch to get back in.
Lower Radiator Hose Support Bracket (loosen bolt but don't remove)
The supplied longer steering rack bolts are too long to fit into the two front rack holes with the shims in place because the frame cross member blocks them. You have to put the front bolts and washers in place before you install the shims. Just drop the new bolts with washers in the front steering rack holes, you don't want them to go all the way down into the frame until after you get the shims in place.
Lift the steering rack and slide the rack shims under the rack. I used a big screwdriver as a lever to raise the driver's side of the rack. If you have trouble moving the steering rack around try turning the steering wheel some. The driver side of the rack is heavier so I used the steering column as a hand hold to lift the rack.
I had to modify the two rear Megan Racing bolts to mimic the shape of the stock bolts--pointed, to allow the bolts to drop all the way down through the shims and into the frame. My bolts were not pointed like the ones shown in the above Megan Racing picture of the kit. I put a nut on the bolt, ground the end of the bolts like the stock bolts, then removed the nut to clean up the thread after the grinding.
I temporarily used the stock steering rack bolts in the rear holes as alignment pins to get the rack, shims, and frame holes all lined up. After getting the new front rack bolts going (thread them in a few turns but don't tighten them down until all 4 bolts are threaded into their holes) remove the stock rear bolts and install then new rack bolts and washers.
The new, longer bolts have a 17mm head but an 11/16 inch socket has just enough slop to allow the angle needed to get to all 4 bolts. I had to use an extension to hammer the bolts a little to get them to drop all the way into the frame. If you do hammer be careful to not damage the bolt threads.
Torque the steering rack bolts to 33 lb-ft.
![]()
Driver Side Steering Rack Shim and New Longer Bolt & Washer
![]()
Passenger Side Front Steering Rack Bolt and Shim
![]()
Passenger Side Rear Steering Rack Bolt & Shim
Reposition the radiator hose support bracket, tighten its 10mm bolt and squeeze the hose and slide into place.
If you removed the stock air box reinstall it now.
Raising the steering rack will add a little toe-out so you'll need to get the front end aligned. I used a Longacre toe-in gauge to set the front toe back to 0. It was at about 0.4 inch total toe-out after adding both this bump steer kit and Megan Racing roll center adjusters. Most of the toe-out came from the bump steer kit. I needed 1 1/4 turns of toe-in at the toe adjusters to get back to 0 toe. See the Alignment How-To for more info.
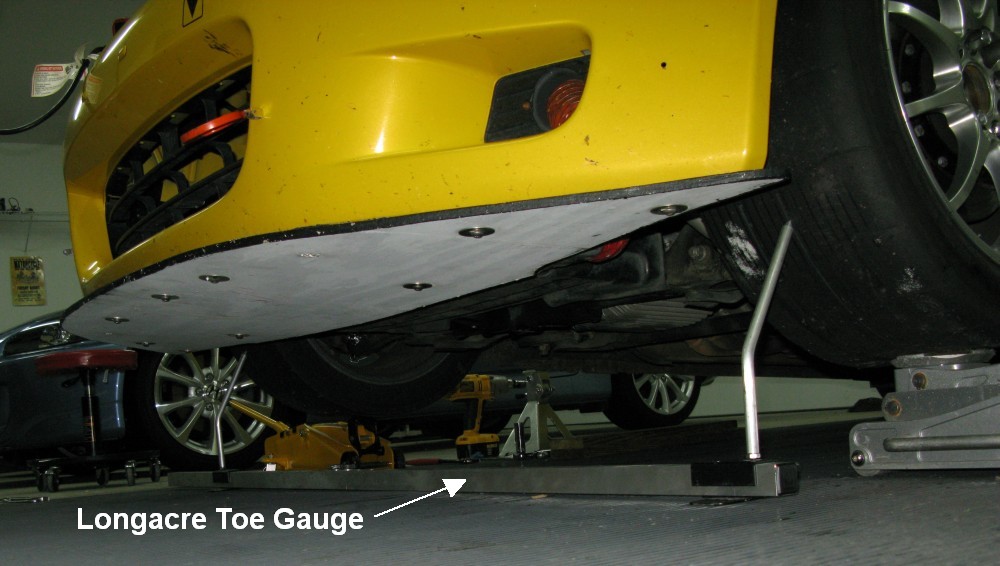
Using Longacre Toe Gauge to Measure and Set 0 Toe
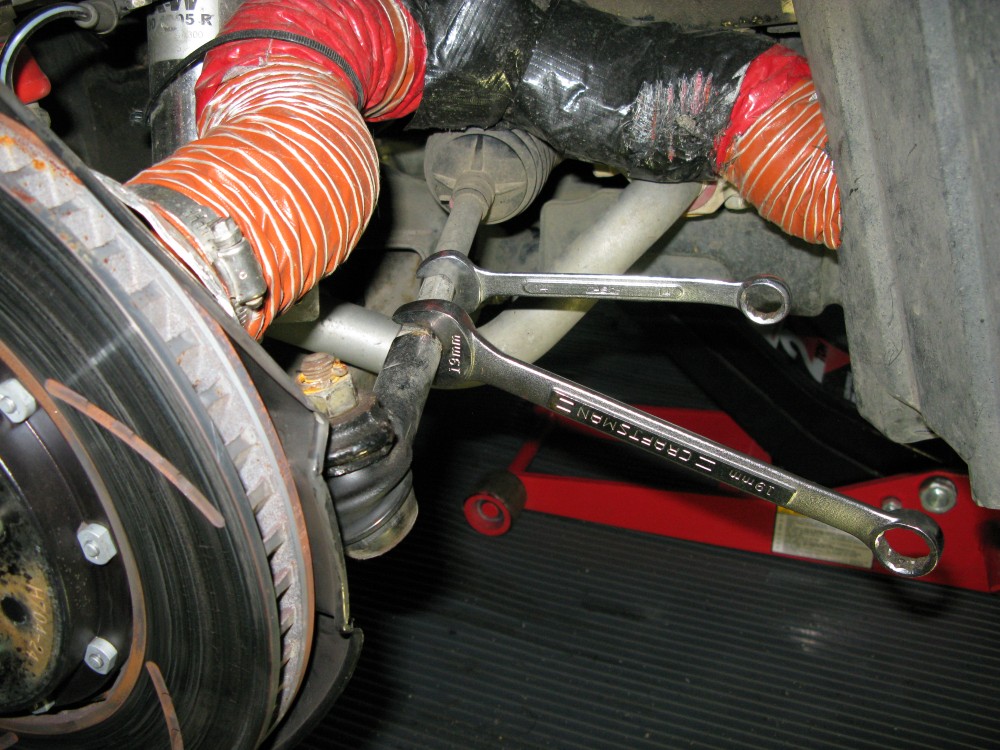
Adjusting Toe With a 19mm & 14mm Wrench
19mm Nut is the Lock Nut, the 14mm Wrench is Used to Turn the Steering Rod to Adjust its Length
Turn the 14mm Wrench Counterclockwise to Shorten the Arm and Add Toe-In
Go out and test drive your new, sweeter handling S2000.