S2000 APR GTC-200 Wing Install (S2000 Specific Mount)
By Rob Robinette
It's actually a pretty easy install, but it does take some guts to drill that first hole in the trunk lid.

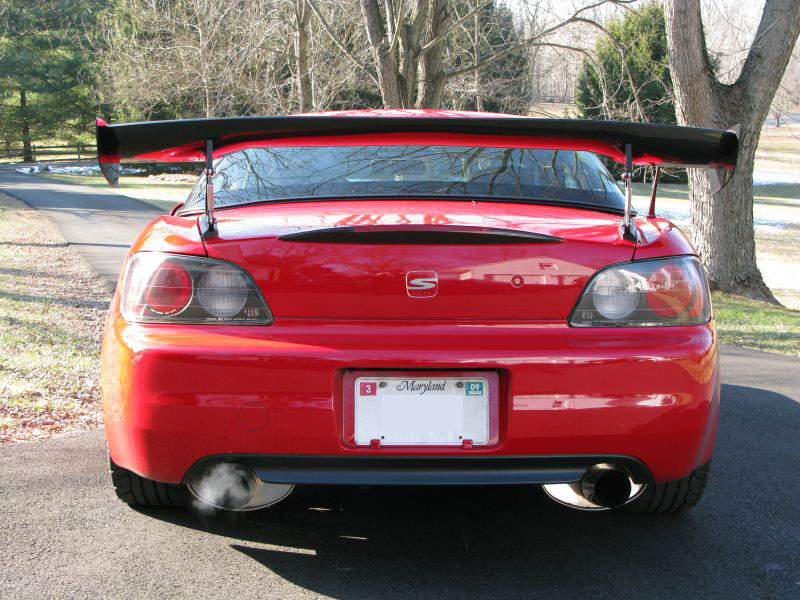
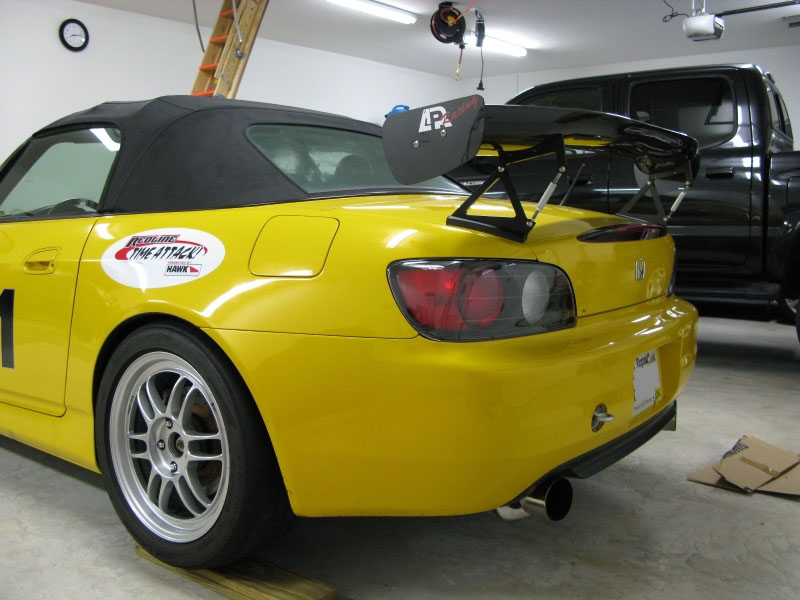
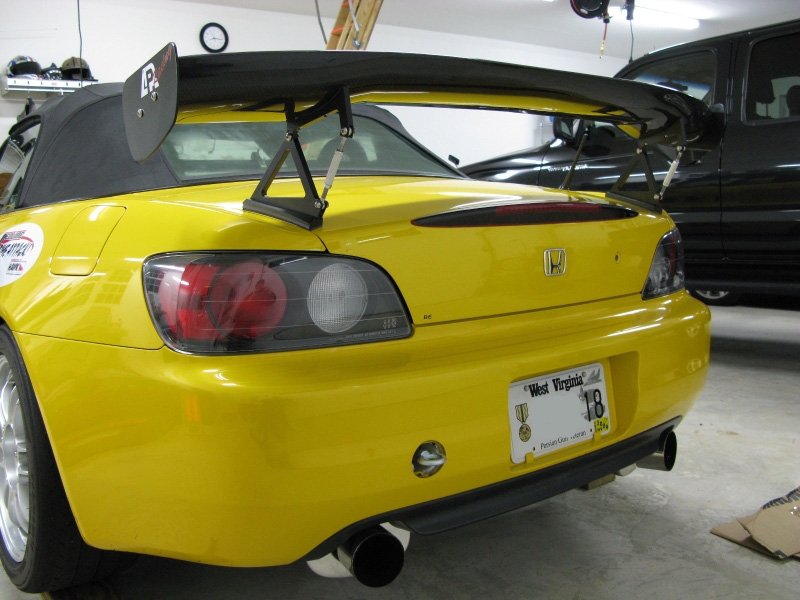
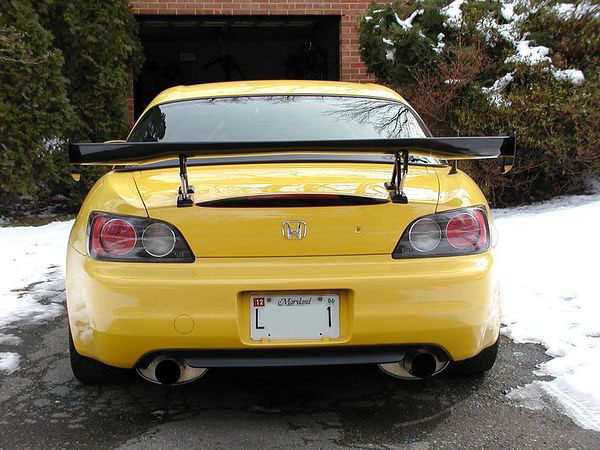
The Finished Product - S2000 Specific Mount
I purchased the wing direct from APR. I used the S2000 specific mount which mounts to the edge of the trunk lid, but you can use the Universal Mount which mounts farther in from the trunk edges and doesn't look nearly as good. APR doesn't list the S2000 application on its website yet but it is available for $650 retail.
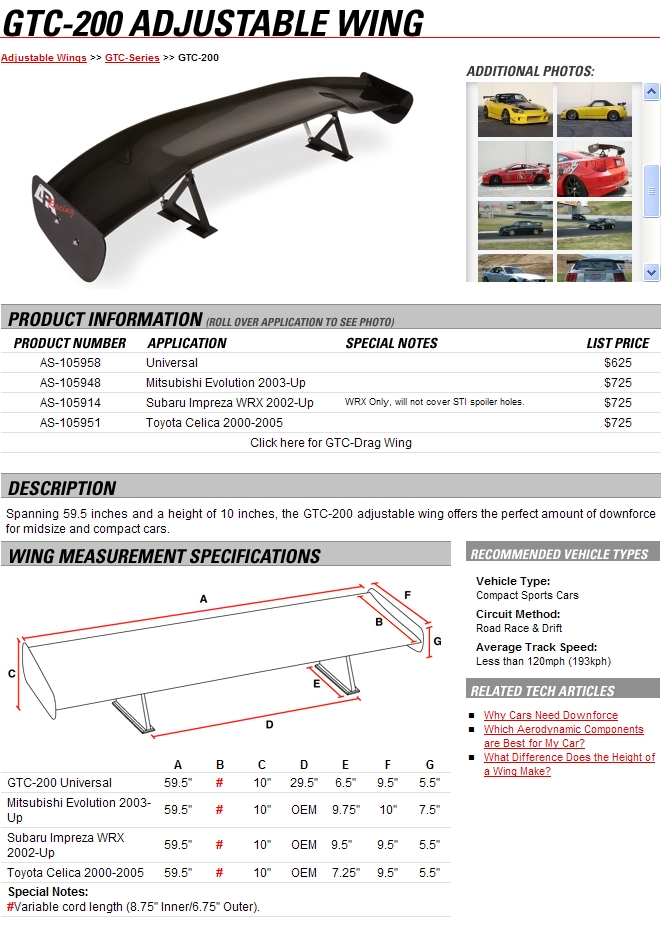
The wing is made of very high quality carbon fiber (it's freakin' beautiful) and the mounts are aluminum which makes for a very lightweight wing. Less weight is very important for anything that is mounted this high on your car.
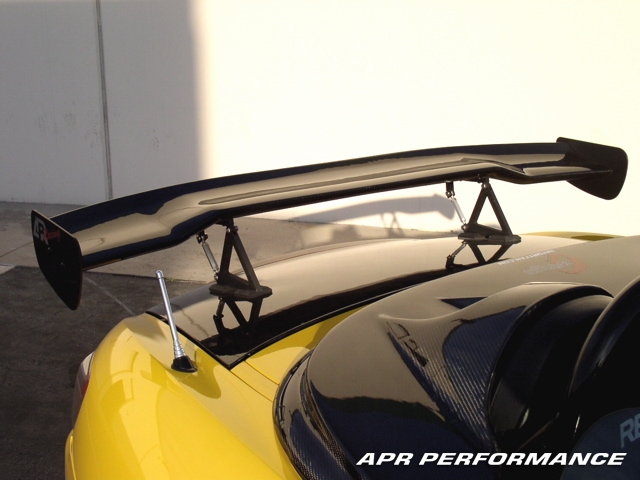
The Universal (non-S2000 specific) Mount
Assemble the Wing
The wing has two sets of mounting holes. The inside set is for the Universal Mount and the outside set of holes is for the S2000 specific mount. Start the assembly by attaching the Upper Pedestal to the wing's outside mounting holes using the M8 ButtonHead bolts and the Rubber Gaskets. One of the pedestals should have a "Driver Side" sticker on it to tell them apart. Don't tighten any bolts yet, leave them lose until the wing is actually bolted on the trunk lid, you need the slop to ease the installation.
Next attach the Adjustable Rods to the Upper Pedestals using the M8 Bolts and Nuts--remember, leave them lose.
Now attach the Lower Pedestal to the Upper Pedestal and Adjustable Rods.
Next insert the studs (threads on both ends) into the Lower Pedestal. I placed some Locktite Red on the end that goes into the pedestal. Make sure you insert the end of the stud without the hex opening and use a hex key to tighten them (this is the exception, you do want to tighten these now), don't over torque them, the pedestal is made of aluminum.
Your wing and mounts should now look like this:
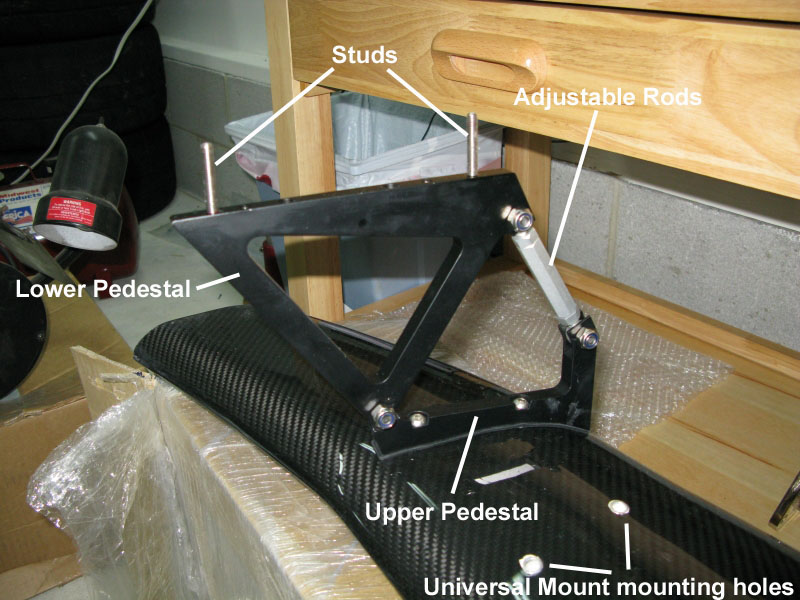
Wing Mount Details
Now the fun part. Get the Base Plates and Gaskets, one of them will have "Driver Side" and "Front" stickers. Start with the driver side Base Plate and place it on your trunk as far back as possible, but with a good contour fit to your trunk lid. See the below photos to see where my holes ended up.
Note: If you think you might end up competing in the Honda Challenge racing series you have to mount your wing so that the wing and endplates don't extend beyond the edge of the car (the "shadow" of the car). You may have to cheat the mount forward a little to keep the endplates from extending too far rearward. It's pretty much impossible to run the APR 2 1/2 inch risers and keep the endplates inside the shadow of the car.
If you have a factory rear spoiler in place you can use the existing outside rear holes for this wing's rear holes, they're right where they need to be.
There's a spot weld mark on the underside of the trunk that will help you orient the aft hole. The straight edge of the Base Plate goes along the trunk edge, the rounded edge to the inside. Make sure you get the placement just right and mark your holes.
When you're very sure of your hole placement, use a pointed punch to make a small dimple in the hood to keep the drill from wandering. Use a 1/4 inch drill bit and drill away. I placed 3 layers of cardboard between the trunk lid and the fender. Be careful, a good drill bit will go through the trunk lid metal very quickly.
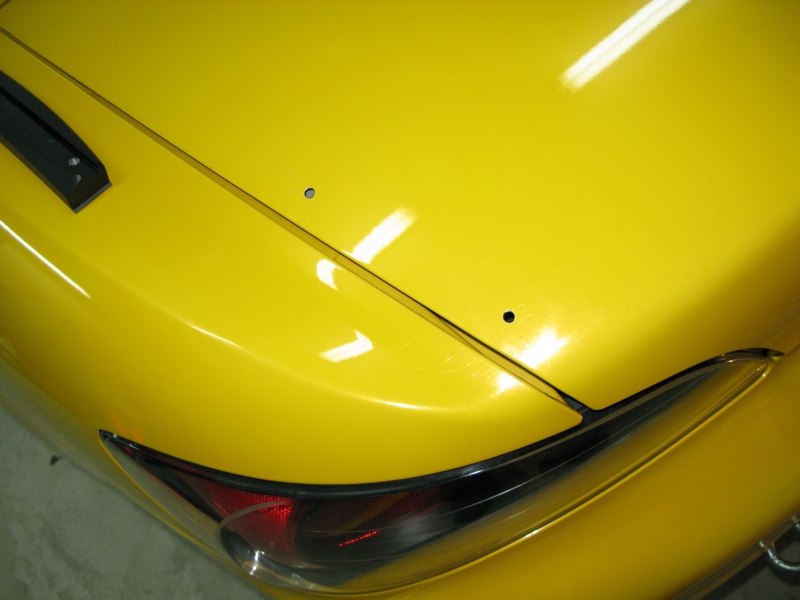
Mounting Holes
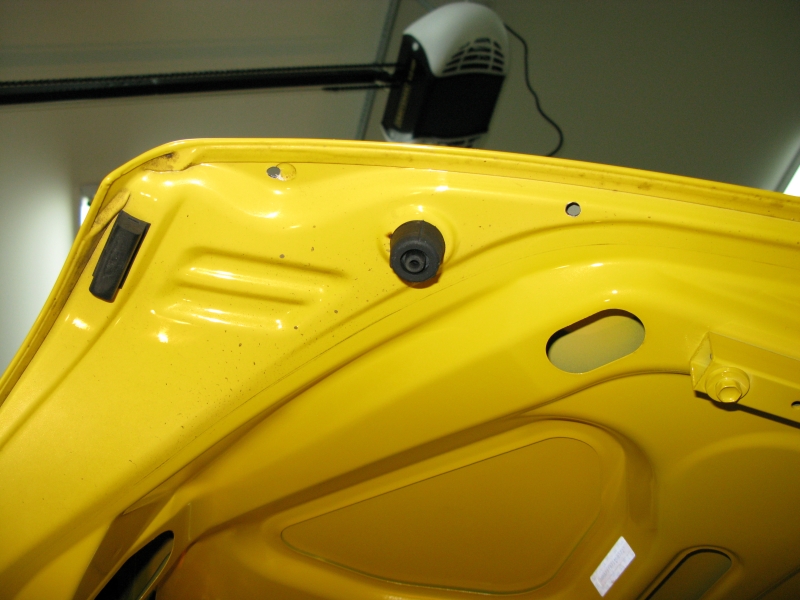
Mounting Holes Viewed From Below - Notice the Spot Weld Near the Left (rear) Hole
It helps to have a helper with the wing fitment, but I did it alone. Place the Base Plates and Gaskets over the studs on the Lower Pedestal and carefully lower the entire wing assembly until the studs fit into the trunk holes. I placed some cardboard on top of the trunk on one end to protect it from the wing mount's studs while I fitted the other end into the trunk holes.
Place one Washer and M6 Nylon Insert Nut on each stud and tighten. Now tighten all the other nuts and bolts, don't forget the 4 ButtonHead bolts that attach the Upper Pedestal to the wing.
Attach the Side Plates to the wing using the M8 Button Head bolts.
Make your initial wing angle adjustments by turning the barrel nuts (simultaneously) on the Adjustable Rods, then snug down the Adjustable Rods' lock nuts and you're done.
Update June 2011
The left side of my trunk lid began to get pushed down by the down force generated by the wing. I now use two 1 inch square rubber "feet" designed for the underside of electronics to reinforce the trunk lid support. The rubber feet are peel and stick. You will be able to see where the stock trunk lid rubber supports ride on the brake light housing. Simply stick two of the rubber feet on the wear mark. Closing the trunk lid is a little harder now. I hold both wing supports with my hands and use them to lower the trunk lid.
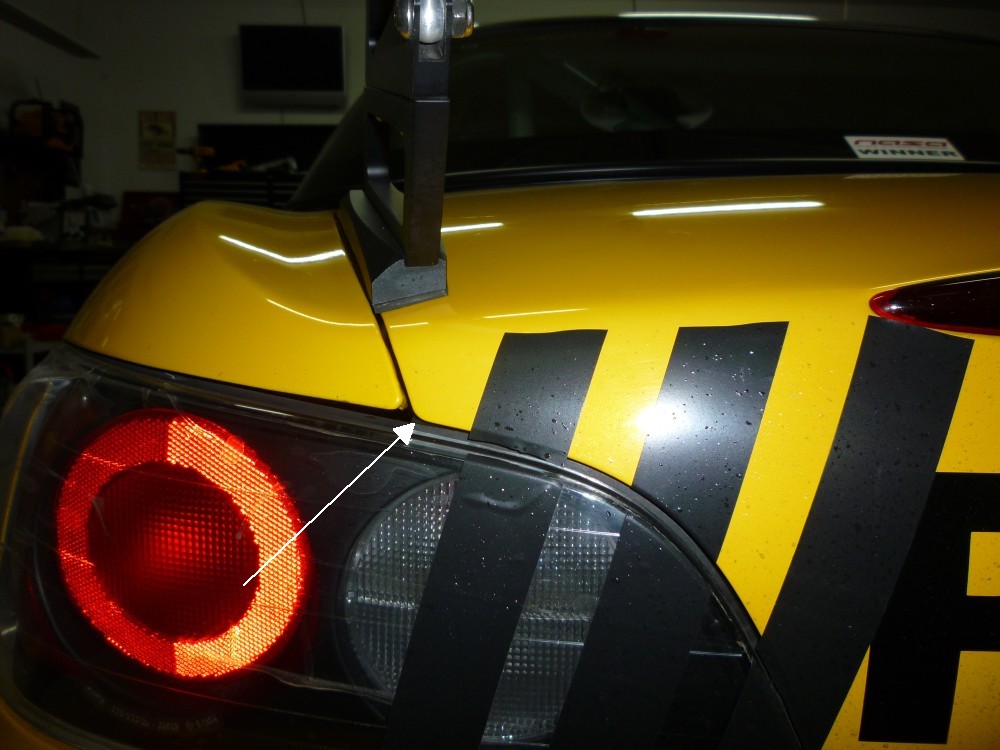
Trunk Being Pushed Down by Wing
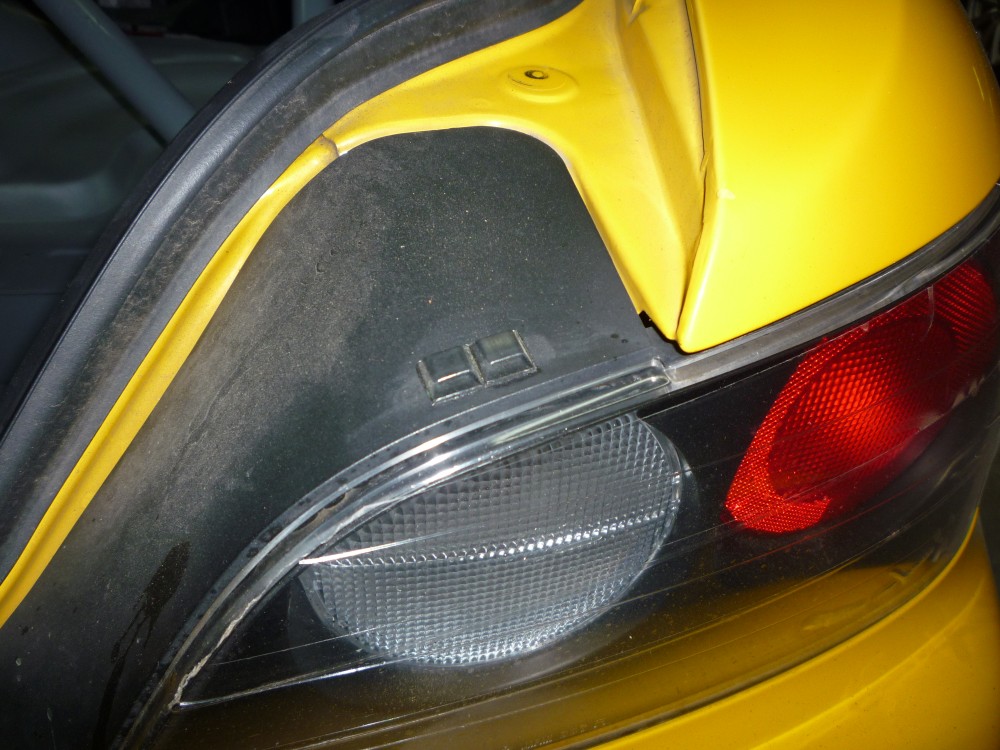
Rubber Supports to Reinforce Stock Trunk Lid Support
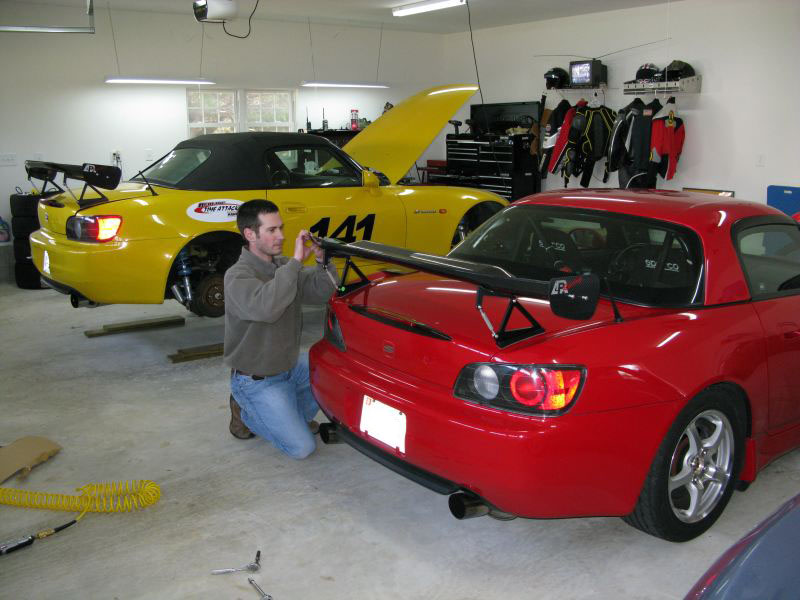
Cale Working on the End Plate
Sweet
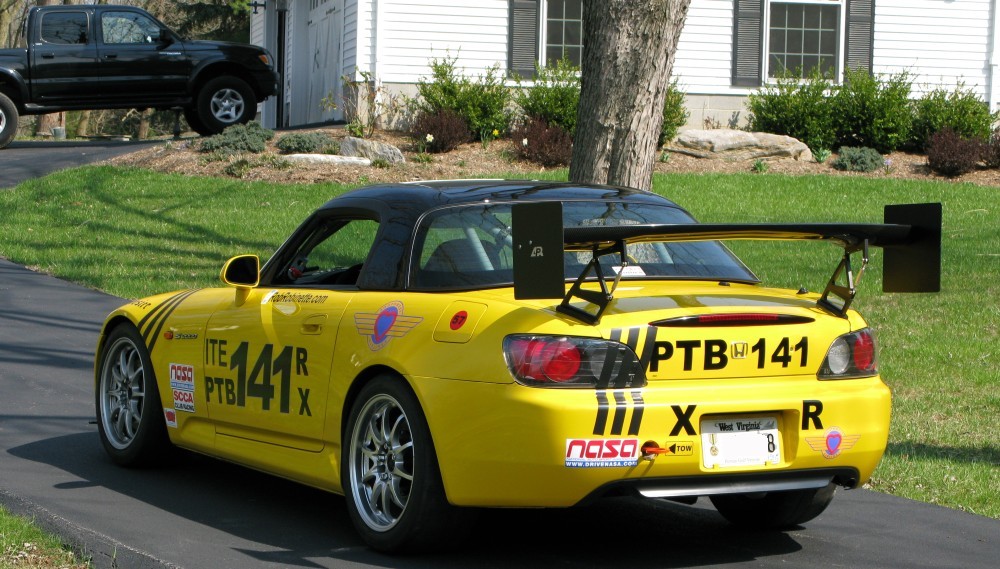
12" x 12" Custom Endplates Prevent Wrap-Around Airflow
APR Risers are Also Installed to Get Wing Higher into Cleaner Air
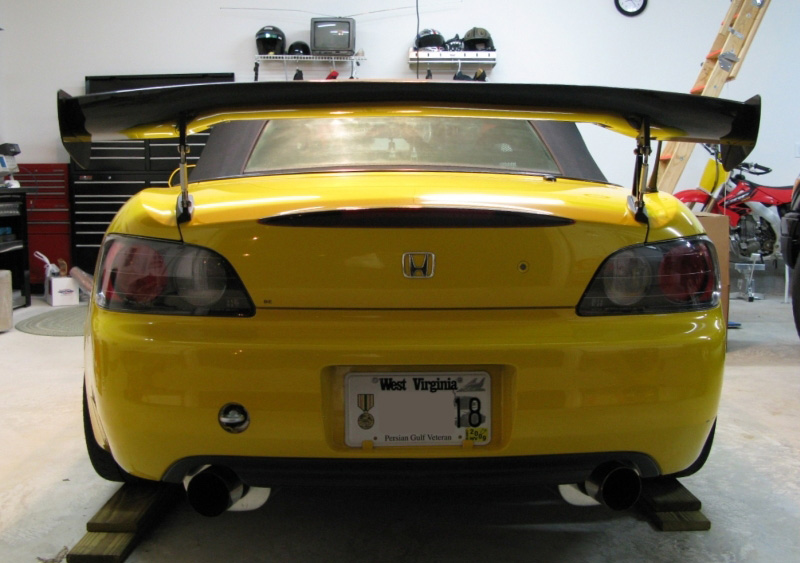
S2000 Specific Mount
The Universal Mount