S2000 Remove Air Conditioning
By Rob Robinette
If you make your S2000 a track dedicated machine removing the A/C is a great way to drop about 30 pounds of weight. That 30 lbs includes the compressor, compressor bracket, A/C radiator, condenser canister, lines to the firewall and the A/C fan (on the radiator). You can drop another 10 to15 lbs by removing the heater unit under the dash in front of the passenger.
You will need a shorter serpentine belt since the compressor is being removed. The standard belt everyone uses is the Goodyear Gatorback 4060450 6PK1145.
Start by taking your S2000 by your favorite shop that does A/C and have them purge your system. Your A/C system is full of refrigerant and oil and it'll make a huge mess if you try to dump it yourself. Older S2000s may even have Freon which supposedly could harm the ozone layer so do the right thing and get it emptied by professionals.
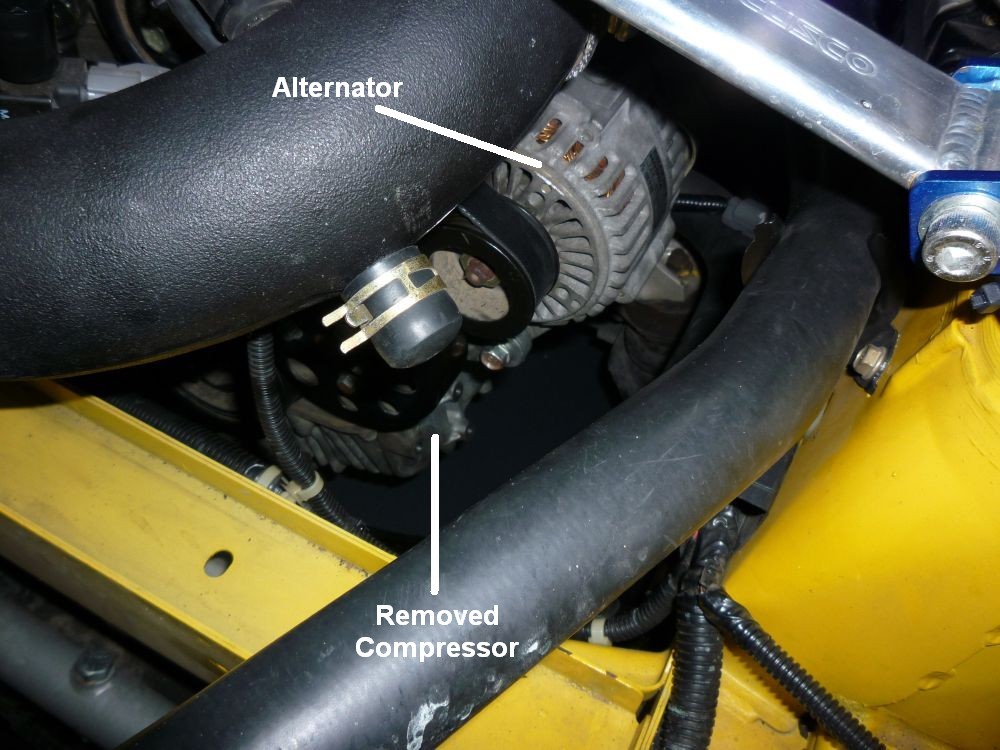
To get to the A/C compressor and remove the A/C radiator you'll have to remove the air intake and alternator.
You must disconnect your battery's negative terminal because the alternator cable is always hot.
My S2000 has an aftermarket cold air intake and I was able to swing it up and out of the way by unbolting the filter end and loosening the manifold clamp. The stock airbox will probably have to come completely out to make room for the A/C radiator removal.
Remove the serpentine belt by putting a 14mm socket on the tensioner pulley (just to the left of the alternator) and turning it counterclockwise to loosen the tensioner pulley which will loosen the belt and allow it to be slipped off.
The alternator has two electrical connectors and two 14mm bolts that hold it in place. It's easiest if you remove the two bolts, rock the alternator back and forth while pulling it away from the engine to get it loose from the mounts. Once loose turn it so you can pull the plastic electrical connector and use a 12mm wrench to undo the large positive cable connection under the rubber boot. Warning - the battery must be disconnected to depower the alternator's power cable.
With the alternator out of the way loosen but don't remove the two 10mm bolts that hold the two coolant lines on the A/C compressor. You want the lines connected to make moving the compressor around easier. Remove the top two 14mm bolts that hold on the compressor. It's easy to get to the bottom 14mm bolts from under the car. With all 4 bolts out you can move the compressor around by its two hoses. Pull it up and out of the way so you can remove the compressor mounting bracket from the side of the oil pan. It has three 12mm bolts. With the bracket out the compressor can be easily dropped down out of the engine bay below the car after the two compressor hoses are removed.
Reinstall the alternator by connecting the plastic electrical connector, attaching the power lead loosely, then maneuver the alternator back into its proper position and bolt it in. Lubricating the mounting surface of the alternator with a little oil makes it much easier to slide into position. Don't forget to tighten the power lead and reposition the rubber boot once the alternator is in its correct location.
Install the shorter serpentine belt by placing it on the engine and alternator pulleys and then looping it over the tensioner pulley's 14mm nut. Put the 14mm wrench back on the tensioner pulley, turn it counterclockwise and slip the belt onto the tensioner pulley.
A/C Compressor Removed (3 empty bolt holes in oil pan)
To remove the A/C radiator you remove two 10mm bolts at the top of the A/C radiator. You may be able to access the bolts through the car's nose inlet. I had the nose of the car removed for a couple of other jobs so it was easy to get to these bolts. You also need to remove the condenser canister from just in front of the A/C radiator. Then remove the two 10mm bolts from of the main radiator that hold it in place. There are two electrical connectors for the two radiator fans at each end of the main radiator that need to be disconnected. Then lean the main radiator forward enough to make a gap to slide out the A/C radiator. Put the main radiator back in place, secure it with the two 10mm bolts and don't forget to re-connect the two fan electrical connectors--on on each side of the radiator.
You can leave both fans in place and run the A/C fan (the driver side fan) for extra cooling by pressing the Air Conditioning Switch in the cockpit. I chose to remove it to allow better airflow at speed. Just leave the electrical connector disconnected and remove the three 10mm bolts that hold the fan in place and lift it out.

A/C Radiator & Condenser Canister Removed
I wanted to leave the car's heater in place for de-fog (at least for now) so I didn't pull the heater/A/C unit under the dash in front of the passenger. I simply cut the A/C lines just before they enter the firewall. Removing the heater core and the associated water lines (which are filled with water) would probably drop another 10-15 pounds.
Enjoy your 30 pound lighter track machine.